The VCF Midwest 2023 Report

You! Yes, you! Are you wondering if anyone shares your passion for an old arcane operating system? Then I’ve got the place for you! Come on down to Vintage Computer Festival Midwest! It’s the most happening place for obsolete tech this side of Lake Michigan! They’ve got Commodores, they’ve got Apples, they’ve got stuff you haven’t even heard of! What the Hell is this? I don’t know, but I wanna find out! Here in Userlandia, we’re going to Chicagolandia for VCF Midwest.

It’s September, and you know what that means—computer con! Geeks across America leap aboard planes, ride friendly trains, or climb into automobiles to make their way to VCF Midwest. With 2023 being its eighteenth edition, it’s been around long enough that people could yearn for its early days. Nostalgia for a thing celebrating nostalgia? Stranger things have happened. The show’s popularity has risen dramatically over the past five or six years, and there’s never been a better time to meet up with fellow enthusiasts of obsolete technology.

Success breeds success and VCF’s attendance has grown year over year as folks like me come in from parts unknown. As I boarded my flight from Logan to O’Hare, I wondered how they would accommodate the expected increase in crowd size. Going to the show with me was my friend Mark, an Illinois local who lives about twenty minutes away from the venue. He’s a veritable regular, having attended the show since 2019. After stuffing a hot hatchback full of old computers and components to donate to the show, we hopped on I-294 and made our way to the Waterford Banquet and Conference Center at Elmhurst’s Clarion Inn. The conditions for attending VCF were largely the same as years past. Free entry? Check. Free tables? Check. Free Parking? Also check. We expected the show to have more attendees than last year, and adjusted our plans accordingly.

Number one: get there early enough to get a good parking spot. We got one of the last remaining spots when we showed up ten minutes before opening time last year. This year we showed up about half an hour before opening and empty spots were already becoming scarce. Somehow we scored a primo parking spot near the doors.

Number two: pack a lunch. Last year the line at the cafe was extremely long and we lost our parking spot after going out to eat. Bringing some sandwiches, chips, and Polars saved us both time and stress.

Number three: bring a hand truck. Last year we had to make multiple trips to the faraway parking spot to unload donations. A hand truck reduced it all to one easily managed delivery of servers and PCs directly to the garage sale.

Some things just can’t be planned around, like waiting in lines or navigating through the sea of bodies or when interesting stuff shows up in the free pile. But what you can plan for is all the cool stuff you’ll see at the show’s amazing array of exhibitors.

Exhibits and Ambience

Just as Mark and I tweaked our plans for attending, the VCF Staff did the same for exhibiting. A big challenge facing VCF Midwest 2023 was the demand for exhibitor space. Allocating floor space for exhibits and tables was so tricky that the show needed to implement a waitlist for the first time in its history. To create more room, the VCF staff relocated the Panel and Auction space from Hall A to a downstairs function room. Now all four sections of the Waterford’s main ballroom could be combined into one large exhibit hall, resulting in 25% more exhibition space. This created some unique logistical challenges for the auction, which I’ll address later, but the tradeoff was worth it.

The crew also optimized the space between tables to improve navigation in the ballroom. Last year the wall dividers were partially open to let people cut through from hall to hall, and this year the dividers were opened even further. Combine that with a central alley bisecting all four rooms and you could walk from one end of the ballroom to another without exiting to the main hallway. Compared to last year the main ballroom actually felt less claustrophobic despite the mammoth crowd of people. One place where crowding can’t be fixed is the main hallway, which serves double duty as vendor space and people space. The vendors lining both sides of the hall and the free pile attracted a sea of people during peak hours, which generated wave after wave of traffic.

Computers of all kinds are peppered throughout the ballroom, but it’s fair to say that the more power-hungry Jurassic-era megafauna congregated in Hall D. Familiar faces like the Meridian PBX and the VCF Midwest phone system from Shadytel Midwest anchored a room full of terminals and workstations. Turn right from the door and you’ll land upon this set of Apollo Workstations. I loved seeing these since I used to live a mile away from Apollo’s headquarters in Chelmsford, Massachusetts. Forgotten Machines’ massive exhibit featured all kinds of stuff from companies that are long gone, like Data General. Did you know RCA made microprocessors? I didn’t until seeing them at Josh Bensadon’s table!

Scott Swayze’s Retromodem was a piece of hardware after my own heart. It’s a replacement PCB for external Hayes Smartmodems just like the 1200 baud one I had back in the day. It connects to your Wifi network up to the maximum supported speed of your serial port, and even makes simulated dial tone sounds when you connect to a telnet bulletin board. It wasn’t the only WiFi to modem bridge on display, either—the WiRSa adapter is a cute little device that bridges your old machine to a new network.

Almost all of these exhibits of the sixties and seventies era machines had some kind of guided demo to help explain these machine’s roles in “data processing.” A common theme amongst these exhibitors of niche and very old equipment is sharing the unique experiences of machines that are hard to find. Steve Maves had a NeXTstation, DEC AlphaStation, and a blue and white G3 with a 21 inch monitor all on one table. That’s so laser focused to my tastes that I couldn’t help but bask in 21 inches of Trinitron glory.

Though other beefy workstations were peppered around all four halls, it was nice to see the evolution of “real machines for real work” as you walked up and down the aisles of Hall D. There were enough Silicon Graphics boxes on display to explore the real breadth and depth of their power. System Source was back, this time with some new additions to their lineup. Other SGI stands included a multiplayer mini-LAN with graphics performance that would have blown away a contemporary PC.

Most people visiting the show are going to be interested in their own favorite platforms, and there’s a healthy balance of hits and deep cuts from the exhibitors. I figure that Commodore was the most well-represented company, with over a dozen tables featuring 64s, 128s, and Amigas. The most distinctive had to be this Commodore Colt PC—I’ve never seen a Commodore PC clone in person before, and this was a fine example. Most tables featured a unique thing you could do with a Commodore, like Paul Wilga showing off a C64 playing Sonic and a C128 with an 8-bit Guitar Hero clone. CBMstuff featured their colored keycaps, Wifi modems, and even a Mega65. It was my first time seeing a Mega65 in person and I have to admit that it looked really cool. Amigas were peppered about here and there, but Ethan Dicks probably earned the award for most Amigas on one table. This funky tower lived side by side with an A1000 and A3000.

You can’t go to an old computer show without tripping over a bunch of Apple computers, and this one’s no exception. Friend of the show Sean from Action Retro had his modded SE/30, of course, but it was joined by one of his new acquisitions: a wicked-fast IIfx. Next door was Joshua Stein, with a working Mac Portable and PowerBook 100 side by side. Passers-by could get a real sense of the magic Sony pulled off in transforming the former into the latter. Speaking of cool portables, Pete R. had a full DuoDock connected to a portable Color StyleWriter. There’s not enough printing at these shows, and anyone who facilitates it gets a gold star. Other cool friends Ron from Ron’s Computer Vids and Steve from Mac84 were nearby to talk all about old Macs. Need some floppies copied for your Apple II? Intergalactic Microsystems had a live AppleSauce setup that could burn your disk images to a real floppy on demand. Avery Grade and Bea Thurman’s Apple II Sight and Sound had this monster stack of Apple IIgs multimedia which let the computer really flex its audiovisual muscle. The towering Altec Lansing speakers are the peak of 1990s computer audio aesthetic. Lots of Mac mods were on sale from CaymacVintage, with ROM SIMMs, flashers for those SIMMs, diagnostic equipment, and more oddly specific stuff for your oddly specific Mac.

Atari computers and consoles rivaled Commodore in how much table space they occupied. The Chicago Atarians lead the charge with this fantastic Atari VCS display, which carries the torch from their big glass cabinet that unfortunately perished after last year’s show. Ever used an Atari Falcon? I got a chance to test drive one thanks to Liam Coyne’s display of ST systems. Maybe 8 bits is more your style, and if that’s the case you could see a whole lineup at Slor’s Atari for Show, Small Iron for Dough. If you want to connect to other Atari fans using original hardware, the Atari BBS community had live demos to show how you can still go online with your Atari computer in 2023. And if you’re interested in BASIC programming on the Atari ST, check out this Apollo standalone running the GFA Basic editor.

What about IBM and compatibles? Joshua Conboy’s OS/2 and You returns, this time with even more paraphernalia and boxed software. Kevin Moonlight’s collection of IBM Palmtop Thinkpads demonstrated that a little chassis could mean big power. Of course they can run DOOM, but did you know they could be repurposed to portable video players? If workstations and servers are more your style, then Mike Mason and Chris Simmons’ tables have what you need. An AS/4000 next to a PS/2 Academic System tower shows that whether it comes in black or white, IBM knows how to make a good looking server. IBM tech also powered this retro selfie station thanks to this washing machine-sized printer. Where iBM goes, clones tend to follow, and there’s plenty of PC platform equipment lurking about.

With the host of the usual British computer exhibition unable to exhibit at the show this year, the community had to step up to ensure representation of computing from across the pond. Sinclair systems of all kinds were highlighted at Scott Hardin’s table. The Other 8-Bit Computer Maker had the full line of Sinclairs from the ZX80 all the way to the modern ZX Spectrum Next. And since the Spectrum is one of the most-cloned systems out there, you could see some modern reproductions on display from Chris and Gavin Tersteeg.

If you thought I’d forget about the Tandy folks, think again. VCF Midwest takes place during SepTandy, after all! Almost every hall had a CoCo or two running a demo. And you can’t escape the TRS-80; this one at Nihongo Retro had a very cool floppy replacement with USB thumb drives.

Japanese computers also had a healthy presence thanks to some new and returning faces. Danielle from Thegirlgeek returned with the Casio Loopy and Sharp x68000, but there were other x68000s lurking about as well. Nearby was nephrite.fm with Nihongo Retro, which had a lovely NEC PC-98. Not one, but two Famicom Basic setups were on display this year. And if you were curious about the MSX, Liam Coyne’s Sony MSX setup was a fine way to see the platform that built Hideo Kojima’s empire.

Dante Blando had this neat micro server called the NetWinder. Made by Corel of CorelDraw fame, the NetWinder could be deployed as a slim server or workstation. It has the distinction of being the first commercial ARM-based Linux machine. Neat!

Want a Gravis Ultrasound but don’t have the scratch to get one on eBay? Ian Scott’s PicoGUS can bring one to your ISA-based computer thanks to the power of the Raspberry Pi Pico. And if you want to learn more about other PC sound cards, the OPL Archive can fill you in on the wonders of FM synthesis.

Hey Kids, it’s Crusty the Mac! This Mac SE has survived multiple burials, and amazingly still works, although when I came by it wasn’t running anything or doing anything. This meme machine makes a rustic fashion statement at every festival it visits.

Keeping a returning exhibit fresh is a challenge on its own, and the folks at Genericable are doing their best to keep the excitement around obsolete cable television alive. Preview Guide and the Weather Channel kept everyone up-to-date on the event’s programming and weather conditions. Princess Twilight Sparkle has blessed the weather this weekend, apparently. Sit down with a character generator and make your own title sequences to show off to your friends at home!

Lastly, I’d like to give an award for “Committing to the bit” to this giant SX-64. This macrocomputer is exactly the kind of gimmick I want to see at these shows. The CMBSX64 Ultimax looks like the kind of interactive exhibit you’d find in a science museum. Very cool.

Testing the Limits

VCF Midwest has called the Waterford Conference Center its home since 2019, and every event has exceeded expectations. With an estimated 3,000 attendees this year—nearly 50% more than last year—VCF is showing no signs of slowing down. And that popularity brings some complications, both expected and unexpected. For 2023 the venue and VCF staff tackled these challenges head-on, and they largely succeeded.

The first—and most obvious—limit is parking. This year VCF Staff made official arrangements for overflow parking, but it was quickly exhausted on Saturday. Given its location in suburban Chicagoland, cars are the only practical way to get there. Carpooling might be a good idea if you’re local! If you’re staying at an offsite hotel, consider sharing a ride with a fellow attendee. There isn’t much more that can be done except moving to a new venue, so my advice to fellow attendees is to arrive early and plan your day so you don’t lose your spot.

I’ve already mentioned the adjustments made to the exhibit hall to maximize table space. I think these moves worked out in favor of the show, because more tables means a wider variety of exhibitors. But allowing more tables isn’t without complications. Power was particularly problematic—there were considerable voltage sags as the weekend progressed. Many demos and machines lost power at various times during the weekend. Some exhibitors scrambled for voltage regulators while others had to wait for electricity to be restored. Expanding into Hall A was also the last lever the show could pull to increase indoor exhibit space—there’s literally nowhere left to put tables without making significant compromises.

Another consequence of expanding the exhibit space is changing the flow of walking traffic. I thought the main ballroom felt less crowded overall despite more people attending the show. Most of the attendees were cognizant of not blocking aisles, and exhibitors did a good job of keeping their tables within their actual space. But when you put a bunch of bodies in one room you’re bound to hit a few snags. Take the end cap of Hall B. It’s been the traditional home of the show’s VIP guests, and on the face it sounds like a great idea. Being able to meet LGR, Krazy Ken, 8-Bit Guy, Voidstar, and Ben Heck all in one row of tables sounds like an amazing idea. But the downside to that is lines, lines, and more lines. Plus, when a non-tabling guest holds court nearby, that adds even more bodies into the mix. Thankfully the lines eased up as the show went on, but there was always a bunch of bodies in the area. Are there ways to solve this? Absolutely, but they come with their own tradeoffs. VIPs could be split up and moved around the hall to clear up the jams, but that takes away some of the magic of seeing all these people together. Plus, the guests might like being in their traditional spots! The right and proper solution is a dedicated VIP area with queues, but the guests might not like that isolation, and it can’t be done in the current venue anyway due to lack of floor space.

Lines and bottlenecks weren’t exclusive to the VIP guests, either. This year the show’s doors didn’t actually open until 9, and sure enough a significant line formed at the door. This line took a while to clear as it immediately led into the garage sale and T-shirt tables, which formed their own line that interfered with this line! There is an alternate entrance to the venue, so you weren’t blocked completely, but if you were a newbie this wasn’t eminently obvious. There’s not enough space to relocate those tables, and the doors aren’t wide enough to set up multiple entry queues without blocking egress. The sizable T-shirt and garage sale line did move at a reasonable pace during the day, but you needed to commit to it. I don’t think it cleared up until the T-shirts sold out in the mid-afternoon.

The last bottleneck is food service. You were going to wait a while to get lunch from the venue’s cafe, and tables were crowded. If you weren’t hungry enough for lunch but still felt a bit peckish, a stand offering snacks and drinks for sale was open in the main hall on Saturday. That was new for this year and it’s a smart way to let people get something light without clogging up the main counter. Also, I understand that encouraging people to buy lunch to support the venue is a noble idea, but a single register is not up to the task of feeding everybody at the show. We brought our home-packed lunches because we had the capability and that freed up a spot in line for someone that was traveling from out of town and needed to eat at the cafe. To cover my lack of buying lunch I donated an extra $20 to the show, but I’d have no problem spending that money on expanded food options if I didn’t have to wait 30 or 40 minutes in line.

Let’s Make a Deal

VCF Midwest is jokingly referred to as an overgrown flea market, and the people cracking those jokes aren’t wrong. Just like last year, vendors in the hallway and some exhibitors in the ballroom are happy to sell you just about anything. If you’re hunting for something specific, this is a good place to find it. Computers, parts, and paraphernalia are all here if you’re willing to open your wallet.

Most of the vendors were folks in the main hallway selling hardware and software in spreads across their tables. Karl and Ted’s Excellent Macventure specialized entirely on classic Macs and Mac accessories. There were more Macs at this table than I could count, and I’d say they’d sold about 95% of them by Sunday afternoon. Bonus Life Computers were back with more restored machines, and the usual Commodores and Tandys were joined by this cool Tektronix terminal. The Wisconsin Computer Club was parked in their usual spot by the corner with an impressive array of parts for many old machines. BitHistory’s buckets of big box software was cool, but these Zenith Data Systems laptops are even cooler.

If you weren’t looking for hardware, there were plenty of people selling software. Big box, small box, jewel box, and even no box programs were available. Plenty of console games were for sale too, with box after box available at an outdoor vendor.

Here’s a clever idea: sell accessories and doodads that people at the show will need, like this rack of video and power cables. It’s brilliant, really—you could buy a Commodore 64 at one table and then walk over to 8-Bit classics to buy a matching chroma-luma cable. And when you’re done messing about with your new system, you could kick back and read one of the many books they had for sale about computing history.

Need a hard drive emulator? The BlueSCSI folks were here in full force with all flavors of BlueSCSI to replace your sputtering SCSI hard drives. With some Macs on hand to demonstrate its features they were able to sell almost their entire inventory over the weekend. Not bad!

MacEffects had a shiny new product to present: a transparent RGB mechanical keyboard for the Apple IIc. If you don’t set yours up in an Apple rainbow pattern, then you’re not really living. Their color Mac SE cases were on display, though I wasn’t sure if any were actually for sale. I still marvel at the clarity of the transparent Apple II case—if this same case travels to all the shows, it’s held up really well.

And hey, it’s great to see the TechDungeon folks again after meeting them for the first time at VCF East. Their array of merchandise has expanded considerably, and they had a pile of boxed vintage machines that they sold throughout the weekend.

Joining the more business-like vendors were individuals selling large collections, personal or otherwise. This is where you see the niche and the exotic. If you wanted a NeXTstation, here’s one begging for you to take it to its forever home. Sun pizza boxes were hot and ready for takeout. This is where those flea market comparisons come into play, and this veritable bazaar of computing could easily drain your wallet if you weren’t careful. Make sure to practice your haggling skills ahead of time. You’re dealing with old, used gear, and that comes with all the caveats you’d expect.

Most vendors labeled the machines that were working and ones that needed work. If you’re looking for a bargain, you could save by buying a machine that needs repairs. There were certainly plenty of as-is or project machines for sale. But make sure you know what you’re getting into, as almost all sales are final. If a fixer-upper isn’t your style, you might be more comfortable paying a little more for a machine that’s known to be working. For example, Bonus Life has a guarantee and a warranty on systems that have been serviced and tested.

I noticed fewer tables with bins of random stuff for sale in the main exhibit halls this year, which is a plus in my book. One reason why is that most of this year’s large collections of miscellany weren’t indoors. Because of the high demand for tables, the show staff gave official blessing to set up outside. That meant tables lining the walkway to the main entrance and people selling out of the trunks of their cars. This kept people from wandering the halls trying to sell stuff, which I think is helpful for traffic flow. There weren’t too many parking lot tables, and they largely stuck to areas where their wares wouldn’t block traffic. These folks were also incredibly lucky that the weather was clear and sunny all weekend long. If the show was a week later it would’ve been raining outside and the entire experiment would’ve been scuttled. There’s also the risk of the tragedy of the commons when it comes to parking lot sales. Who determines who gets to set up where? I even saw someone set up an awning, which, well, okay, one is fine, but imagine if a bunch of people started setting up tents or awnings and hijacking adjacent spaces for their makeshift sales? I have to imagine that if the show wants to set up an unofficial outdoor flea market area, the center courtyard would make a great place for it.

After you spent your discretionary dollars at the various vendors, your next stop could be the VCF Midwest Garage Sale, which sells donated items to raise funds for the show. This year’s sale was especially packed, and some bargains could be had if you swung by at the right time. This is a great showing by the community, and I’m sure the show raised thousands of dollars from the generosity of attendees who donated items. There’s only one suggestion I’d make to my fellow donators, and that’s to put a little bit of effort into what you’re giving to the show. Case in point are these old HP Inkjet printers. We had a debate over whether they were uncool or not—we settled on cool due to the fact they had both parallel and serial ports—but damn were they dirty. Considering the effort Mark put into his servers—cleaning them, zeroing out the disks, loading a valid ESXi install, and so forth—the minimum you could do is wipe them down. A little bit of spit shine can go a long way to help the show sell your donations. You do want to raise as much money as you can to benefit VCF, right?

If some of the donations were too cool for the garage sale, they would get set aside for the famous VCF Midwest auction. The downstairs function room was at full capacity as chief organizer Jason Timmons once again donned a getup straight out of a county fair—complete with Stetson hat! But he wasn’t all hat and no cattle, because even when faced with several technical challenges the auction kept a brisk pace. The first challenge was how to present the items to hopeful bidders. Bringing them all downstairs wasn’t practical, so the crew upstairs used cameras to broadcast a video stream of the items up for bids. Everything from Xserves, terminals, and big box games paraded across the big screen next to Jason, and save for a once or twice hiccup on the camera feed this worked like a charm. I didn’t bid on much—I tried for some of the boxed software, but was quickly outbid by other attendees. Even with all the cool stuff on display there wasn’t something that spoke to me personally like that NeXT accessory kit did last year. Don’t worry—the show got my money in other ways.

Last, and of course not least, is the legendary free pile. This year’s free pile was so huge that it was two piles, really—one in its normal home in the hallway corner and another in the outside courtyard. Once again this was possibly only because of good weather—a passing rainstorm would have soaked anything on the open tables. Yet the organizers did the best they could to tame this torrent of generosity. Guesstimating how much will be given away is an impossible task, but I can’t imagine next year’s free pile being any smaller. To my fellow attendees, consider your behavior when taking and leaving items at the free pile. The inside free pile was unable to cope with the number of items and people constantly hovering over it. Sometimes it felt less like a share-alike giveaway and more like vultures picking on corpses. The VCF Midwest rules are pretty sensible, but maybe people aren’t adhering to the spirit of the pile. For instance, don’t bring non-computer stuff. Who leaves a pressure cooker, honestly? Also, to you jerkbenders taking stuff off the table to resell it, shame on you! And for God’s sake, don’t leave stuff behind for the show to dispose of afterwards. You know who you were.

People and Panels

Vendors and exhibitors may get attendees in the door, but what makes them stick around is the crowd itself. I know that’s tautological, but a convention would be a pretty lonely place if you were the only person there. With a dizzying crowd of attendees, exhibitors, guests, and staff, you’re in good company when it comes to old computers. It’s hard not to make new friends and connections with a crowd as big as this one.

VCF Midwest’s a community driven show, and that’s reflected in its panel schedule. Programming an event like this isn’t easy, but VCF Midwest strikes a balance of big crowd-pleasers and niche subjects I’ve never heard of before. Where else can you hear about reverse engineering an online service, or a deeply detailed history of a dead software company? There’s the requisite Youtube personality roundtable, of course, but you’re missing out on some really cool presentations if that’s the only one you see. Ever wondered how a terminal works? Richard Thompson will take you inside old-school HP, DEC, and Beehive models to show you how we interfaced with mainframes and minicomputers. Eric from Eric’s Edge had a whole stack of slides about Hypercard. Ron and Steve served up a sequel to last year’s Mac collecting panel by focusing on PowerBooks and Apple portables. The willingness of the show to let people passionately delve into niche topics is great to see.

Community is also about doing things together, and there were two excellent ways to do that. One was the Build-a-Blinkie tables by the bistro, where you could learn the basics of flux and solder. I saw several complete strangers having a great time learning some DIY skills. They weren’t just building circuit boards, they were building friendships. Same goes for the LAN Party area right next door. A collection of machines from the height of the LANing era running some greatest hits like Quake, Unreal Tournament, and Doom gave attendees the chance to take a fifteen minute break from the hustle and bustle to relax with some gaming. There’s a special feeling you get when fragging folks shoulder-to-shoulder that can’t be replicated online.

But the most powerful connections we can make are one-on-one with other people. Imagine my surprise when Taylor and Amy from their eponymous show pulled me over at their table to talk about the Apple IIe Computers of Significant History. Or chatting about the finer points of my sound card history with Ian Scott of PicoGUS fame. Something that people forget is that everyone behind those social media handles and Twitch streams and YouTube videos are, well, people! Striking up a conversation is the best way to learn about all the stuff you see. The enthusiasm of exhibitors performing live demos or chatting up random passers-by was infectious. Everywhere you looked you saw people forming new connections and building a stronger community.

Another benefit to mingling with people in person is drawing on a vast ocean of expertise that can be hard to replicate online. A prime example is picking the brains of fellow fixers and tinkerers. During the filming of my SE/30 video the display would spontaneously go blank. A reboot would usually bring it back to life, but it eventually stopped booting altogether. I swapped the logic board with my SE and the problem followed, so I could safely rule out the analog board as the culprit. Could I have messed something up when recapping the board? After spending many hours fruitlessly trawling 68KMLA and TinkerDifferent, I couldn’t figure out quite where to go. Poking around with my multimeter was proving fruitless. At that point it was beyond my ability to troubleshoot, so I brought my SE/30 logic board with me on the trip so Mark and I could diagnose the problem together. With his working SE/30 and a spare parts board I was sure we could solve the mystery. After some poking around with a logic probe and the schematics we determined that something was preventing the CPU from starting—we just didn’t know what.

Mark chatted with Adrian Black about theory of operation, while I tossed a few symptoms at Tom from Amiga of Rochester and his tablemate Eric. They had a few ideas, and the first thing they said to troubleshoot was clock generation. Either the crystal was bad or something was faulty with the clock circuit. Check the clock lines to the chips and find the fault. Armed with that advice, we took another crack at the SE/30 board after the show. After some more interrogation of the clock circuit, we found the culprit: a ferrite bead on the bottom of the board. There’s three of them in series, and the middle one—part J13, that little guy right there—was cracked at its input terminal. It looked OK visually, but it lifted right off the board when heat was applied to it. That bad bead broke the circuit providing 5V power to the clock crystal, and without power the oscillator can’t oscillate. No clock means no CPU which means no booting! We replaced the bum bead with one from the parts board and that cured it of its black screen blues.

We had an inkling that it could be a clock problem, but we didn’t know exactly where to look or which chips to probe. Having some experts to point us in the right direction saved us hours of faffing about. Mark posted a complete post-mortem on 68KMLA, just in case if you run into the same issue. We owe many thanks to Tom, who ought to get a medal of commendation for offering advice to anyone who asked while simultaneously fixing paying customers’ boards.

The Vibe

As I was chatting with Nik Chavez of NK-Tek-Fix Retro Market, he made a quip that I thought summed up the entire show. “VCF Midwest? More like VCF Wild West.” He said he couldn’t claim credit for it since he'd heard it from someone else, but this game of telephone rings true. VCF Midwest is capital-C Chaos. Not in the Discord or Jack Garland sense, but in the Muppet Show sense. You never know what you’ll see, and it’s guaranteed to be a good time, but without concerted wrangling by those at the top it would’ve come crashing down.

I’ve tabled at conventions that collapsed because their staff couldn’t handle the pressure or their spending dreams outstripped their budgetary grasp. VCF Midwest isn’t one of those shows—the community shows up not just in person, but with their financial support. The staff is cautious in how they expand the show so as not to overspend. Diversity of both the people attending and the exhibits on display are its greatest strength.

And yet I see VCF Midwest at a crossroads. The past few years have seen such explosive growth because it’s attracting previously untapped audiences. It’s not just local graybeards sitting around reminiscing about the old days. Parents bring their kids to share a piece of their own childhood. Fans come to shake the hands and talk to the hosts of their favorite Youtube channels and podcasts. The numerous vendors create an bazaar so unique that people show up just to shop. The graybeards are still around, but they’ve become elder statesmen who can pass on their knowledge to whole new audiences. This isn't unique to VCF Midwest, but it’s certainly been the beneficiary of prominent figures in the community like LGR consistently returning and using their platform to advertise the show. There’s an almost San Diego Comic Con style air of “I gotta be there, it’s where all the action is!” To their credit, Chicago Classic Computing has embraced this unexpected spotlight wholeheartedly. They understand the kind of responsibility this reputation requires.

The big question is will they be back in Elmhurst again next year? I’m not privy to the show’s financials, so I have no idea what they can afford or what kind of agreements they have in place. But the limitations of the venue have to be on their mind, even if they’re already locked in for next year. The adjustments made for this year have given them enough runway to accommodate some growth. But could the venue absorb another 50% increase in attendance? That’s a valid question. Could the venue support the event five years from now? I’m not sure it could—but that’s assuming current growth trends continue.

I think a good way to blunt some of the demand on tables is to continue emphasizing the main ballroom as exhibitor-oriented space. Take what worked about this years’ changes and extend them further. One way to do it is embracing the flea market reputation and actually organize an outdoor flea market in the central courtyard. Put up one of those big enclosed tents like at a wedding and move the vendors inside along with other traders. Allow people to sell out of the trunks of their cars, but enforce rules like no awnings or tents or occupying adjacent parking spaces. Make sure anyone who wants to do that signs up ahead of time and is assigned a parking space, say, along the north line of spots. Revoke people’s privileges if they behave badly. Take the space gained in the hallways and prioritize it for more exhibitor tables.

I’m sure the staff has plenty of ideas like these to improve the show. I wonder what they could do with just 25% more floorspace, let alone 50. Having some more panel rooms would do wonders, because having more panels balances out the people traffic in the exhibits. Even having more space just for people to walk around would improve the ambiance. You want a show to feel lively, of course, but no one likes feeling like a sardine in a can. When the day finally comes that they have to change venues, I’m confident they’ll handle it well. It wouldn’t be the first time they’ve moved, after all.

After the show wrapped up on Sunday, Mark and I surveyed his massive haul of Macs and miscellany, all of which he acquired for somewhere around $350 total. Not bad, considering some of the price tags I saw around the show. After a dinner break we dove right in to working on my SE/30, inspired by the people we met and the spirit of keeping our favorite old computers going. I even got to spend time enjoying some local fun. If you ever come to Chicago, check out American Science Surplus—I bet if they had a table they would’ve done pretty well too.

That’s the fun part of shows like this—the atmosphere energizes you. Talk to any random person at the show and you’ll hear about what an amazing time they had. There’s no such thing as a perfect convention because pleasing everybody is impossible. Someone won’t be able to get a table, or the weekend conflicts with their schedule, or they couldn’t find that incredibly obscure part they wanted to buy. Them’s the breaks, but that’s not a fault of the show itself. People come back to conventions as long as they’re not boring, and VCF Midwest is anything but boring. Its fate rests on the overall health of the vintage computing hobby, which I believe will weather the eventual deflation of its bubble. I look forward to next year and seeing all the new and exciting ways VCF Midwest will grow.

The 2021 MacBook Pro Review

Here in Userlandia, the Power’s back in the ‘Book.


I’ve always been a fan of The Incredibles, Brad Bird’s exploration of family dynamics with superhero set dressing. There’s a bit in the movie where Bob Parr—Mister Incredible—has one of his worst days ever. Getting chewed out by his boss for helping people was just the start. Indignities pile up one after another: monotonous stop-and-go traffic, nearly slipping to death on a loose skateboard, and accidentally breaking the door on his comically tiny car. Pushed to his absolute limit, Bob Hulks out and hoists his car into the air. Just as he’s about to hurl it down the street with all of his super-strength, he locks eyes with a neighborhood kid. Both Bob and the kid are trapped in an awkward silence. The poor boy’s staring with his mouth agape, his understanding of human strength now completely destroyed. Bob, realizing he accidentally outed himself as a superhero, quietly sets the car down and backs away, hoping the kid will forget and move on.

Time passes, but things aren’t any better the next time we see Bob arriving home from work. He’s at his absolute nadir—you’d be too for being fired after punching your boss through four concrete walls. Facing another disruptive relocation of his family, Bob Parr can’t muster up the anger anymore—he’s just depressed. Bob steps out of his car, and meets the hopeful gaze of the kid once again. “Well, what are you waiting for?” asks Bob. After a brief pause, the kid shrugs and says “I dunno… something amazing, I guess.” With a regretful sigh, Mister Incredible forlornly replies: “Me too, kid. Me too.”

For the past, oh, six years or so, Apple has found itself in a Mister Incredible-esque pickle when it comes to the MacBook Pro. And the iPhone, and iPad, and, well, everything else. People are always expecting something amazing, I guess. Apple really thought they had something amazing with the 2016 MacBook Pro. The lightest, thinnest, most powerful laptop that had the most advanced I/O interface on the market. It could have worked in the alternate universe where Intel didn’t fumble their ten and seven nanometer process nodes. Even if Intel had delivered perfect processors, the design was still fatally flawed. You have to go back to the PowerBook 5300 to find Apple laptops getting so much bad press. Skyrocketing warranty costs from failing keyboards and resentment for the dongle life dragged these machines for their entire run. Most MacBook Pro users were still waiting for something amazing, and it turned out Apple was too.

Spending five years chained to this albatross of a design felt like an eternity. But Apple hopes that a brand-new chassis design powered by their mightiest processors yet will be enough for you to forgive them. Last year’s highly anticipated Apple Silicon announcements made a lot of crazy promises. Could Apple Silicon really do all the things they said? Turns out the Apple Man can deliver—at least, at the lower end. But could it scale? Was Apple really capable of delivering a processor that could meet or beat the current high end? There’s only one way to find out—I coughed up $3500 of my own Tricky Dick Fun Bills and bought one. Now it’s time to see if it’s the real deal. 

Back to the (Retro) Future

For some context, I’ve been living the 13 inch laptop life since the 2006 white MacBook, which replaced a 15 inch Titanium PowerBook G4 from 2002. My current MacBook Pro was a 2018 13 inch Touch Bar model with 16 gigabytes of RAM, a 512 gigabyte SSD, and four Thunderbolt ports. My new 16 inch MacBook Pro is the stock $3499 config: it comes equipped with a M1 Max with 32 GPU cores, 32 gigabytes of RAM, and a 1 terabyte SSD.

Think back thirteen years ago, when Apple announced the first aluminum unibody MacBook Pro. The unibody design was revealed eight months after the MacBook Air, and the lessons learned from that machine are apparent. Both computers explored new design techniques afforded by investments in new manufacturing processes. CNC milling and laser cutting of solid aluminum blocks allowed for more complex shapes in a sturdier package. For the first time, a laptop could have smooth curved surfaces while being made out of metal. While the unibody laptops were slightly thinner, they were about the same weight as their predecessors.

Apple reinvested all of the gains from the unibody manufacturing process into building a stronger chassis. PowerBooks and early MacBooks Pro were known for being a little, oh, flexible. The Unibody design fixed that problem for good with class-leading structural rigidity. But once chassis flex was solved, the designers wondered where to go next. Inspired by the success of the MacBook Air, every future MacBook Pro design pushed that original unibody language towards a thinner and lighter goal. While professionals appreciate a lighter portable—no one really misses seven pound laptops—they don’t like sacrificing performance. Toss Intel’s unanticipated thermal troubles onto the pile and Apple’s limit-pushing traded old limitations for new ones. It was time for a change.

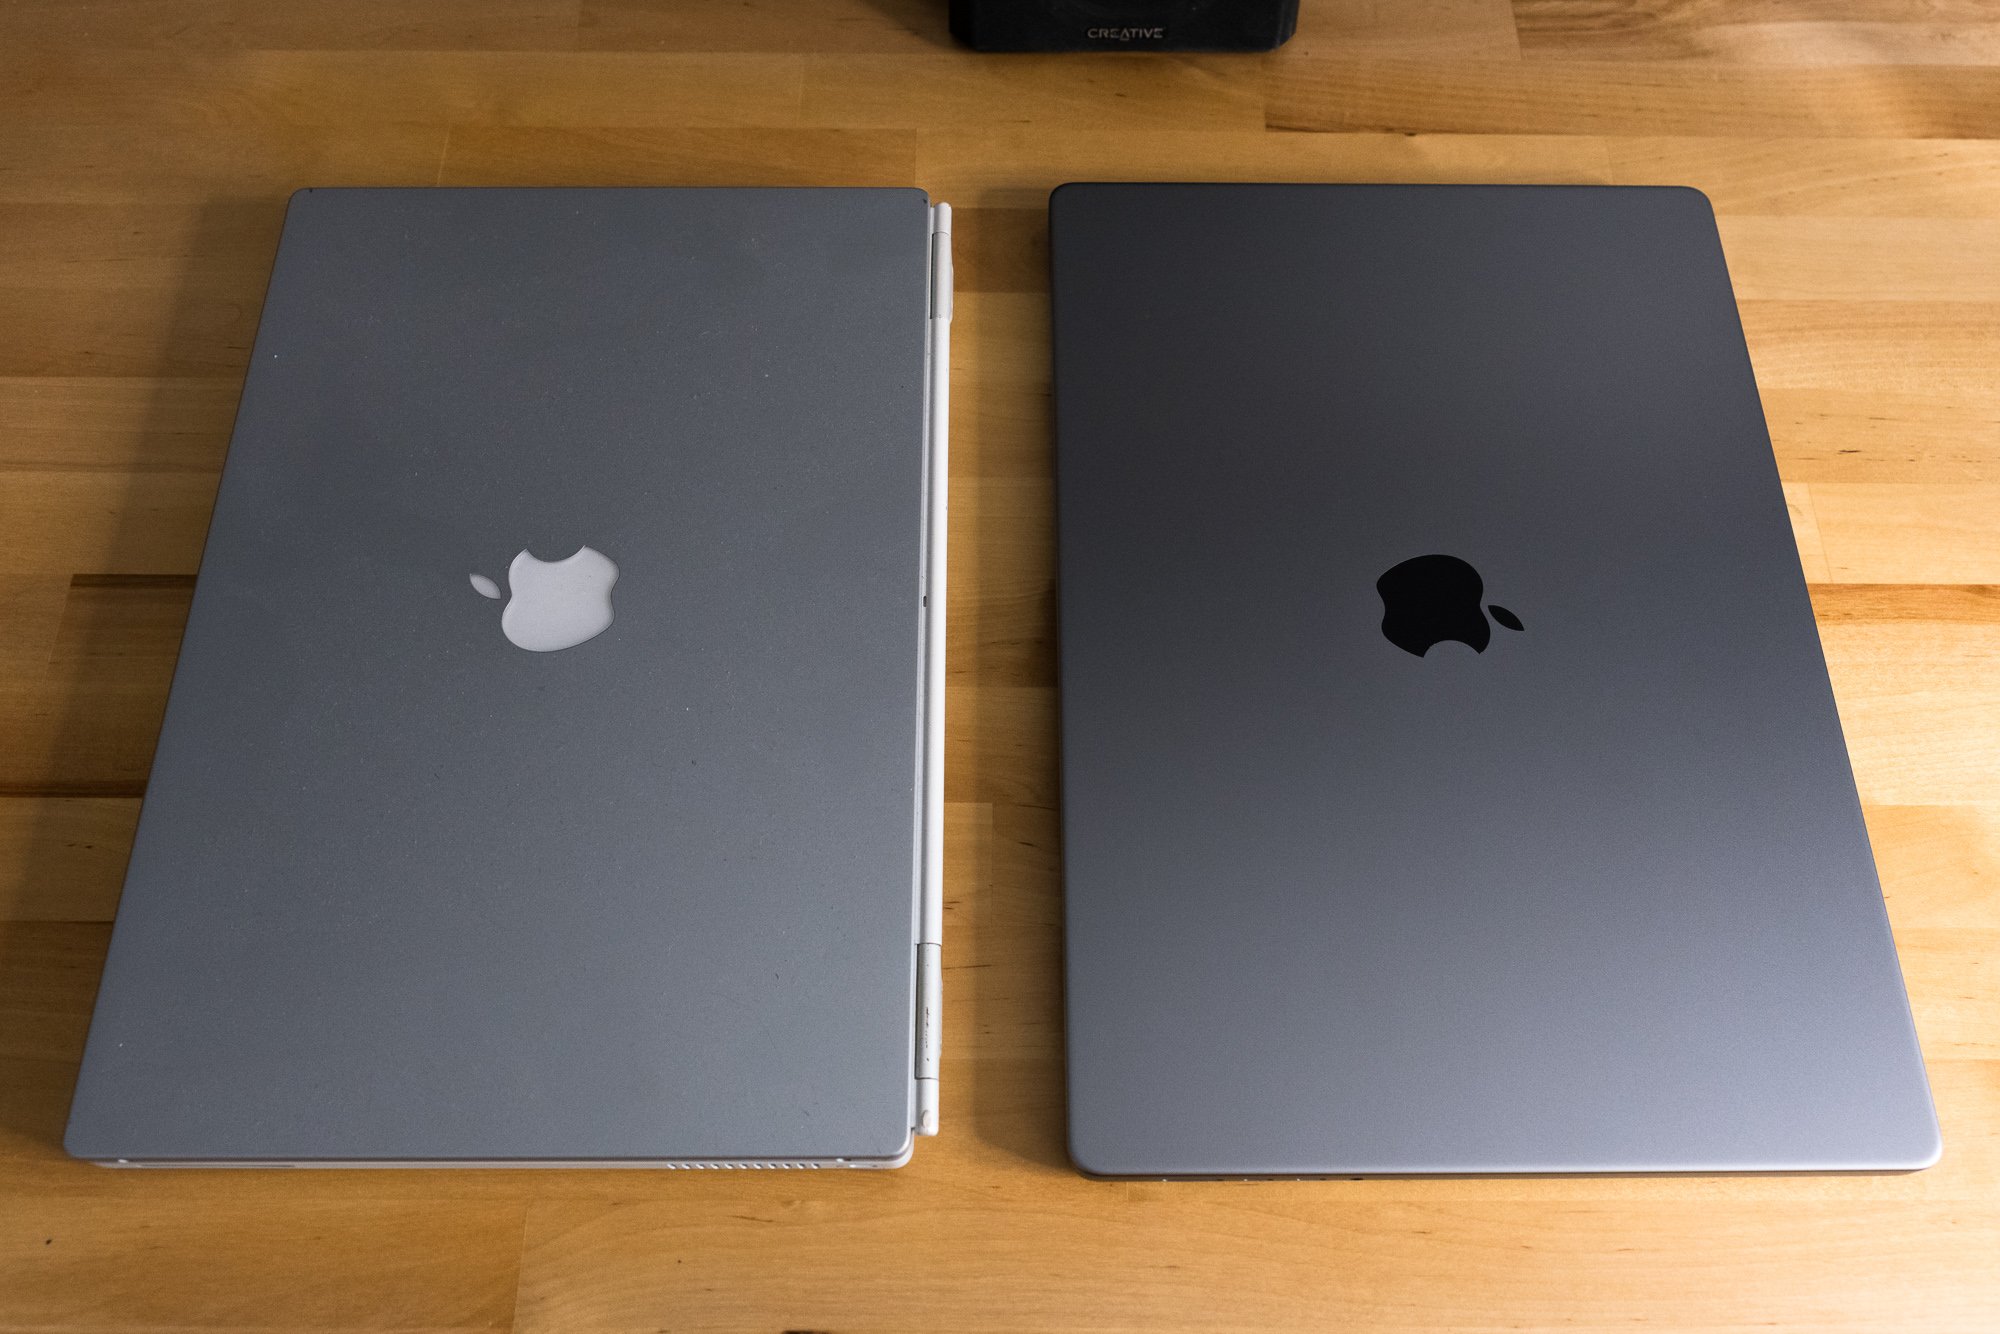
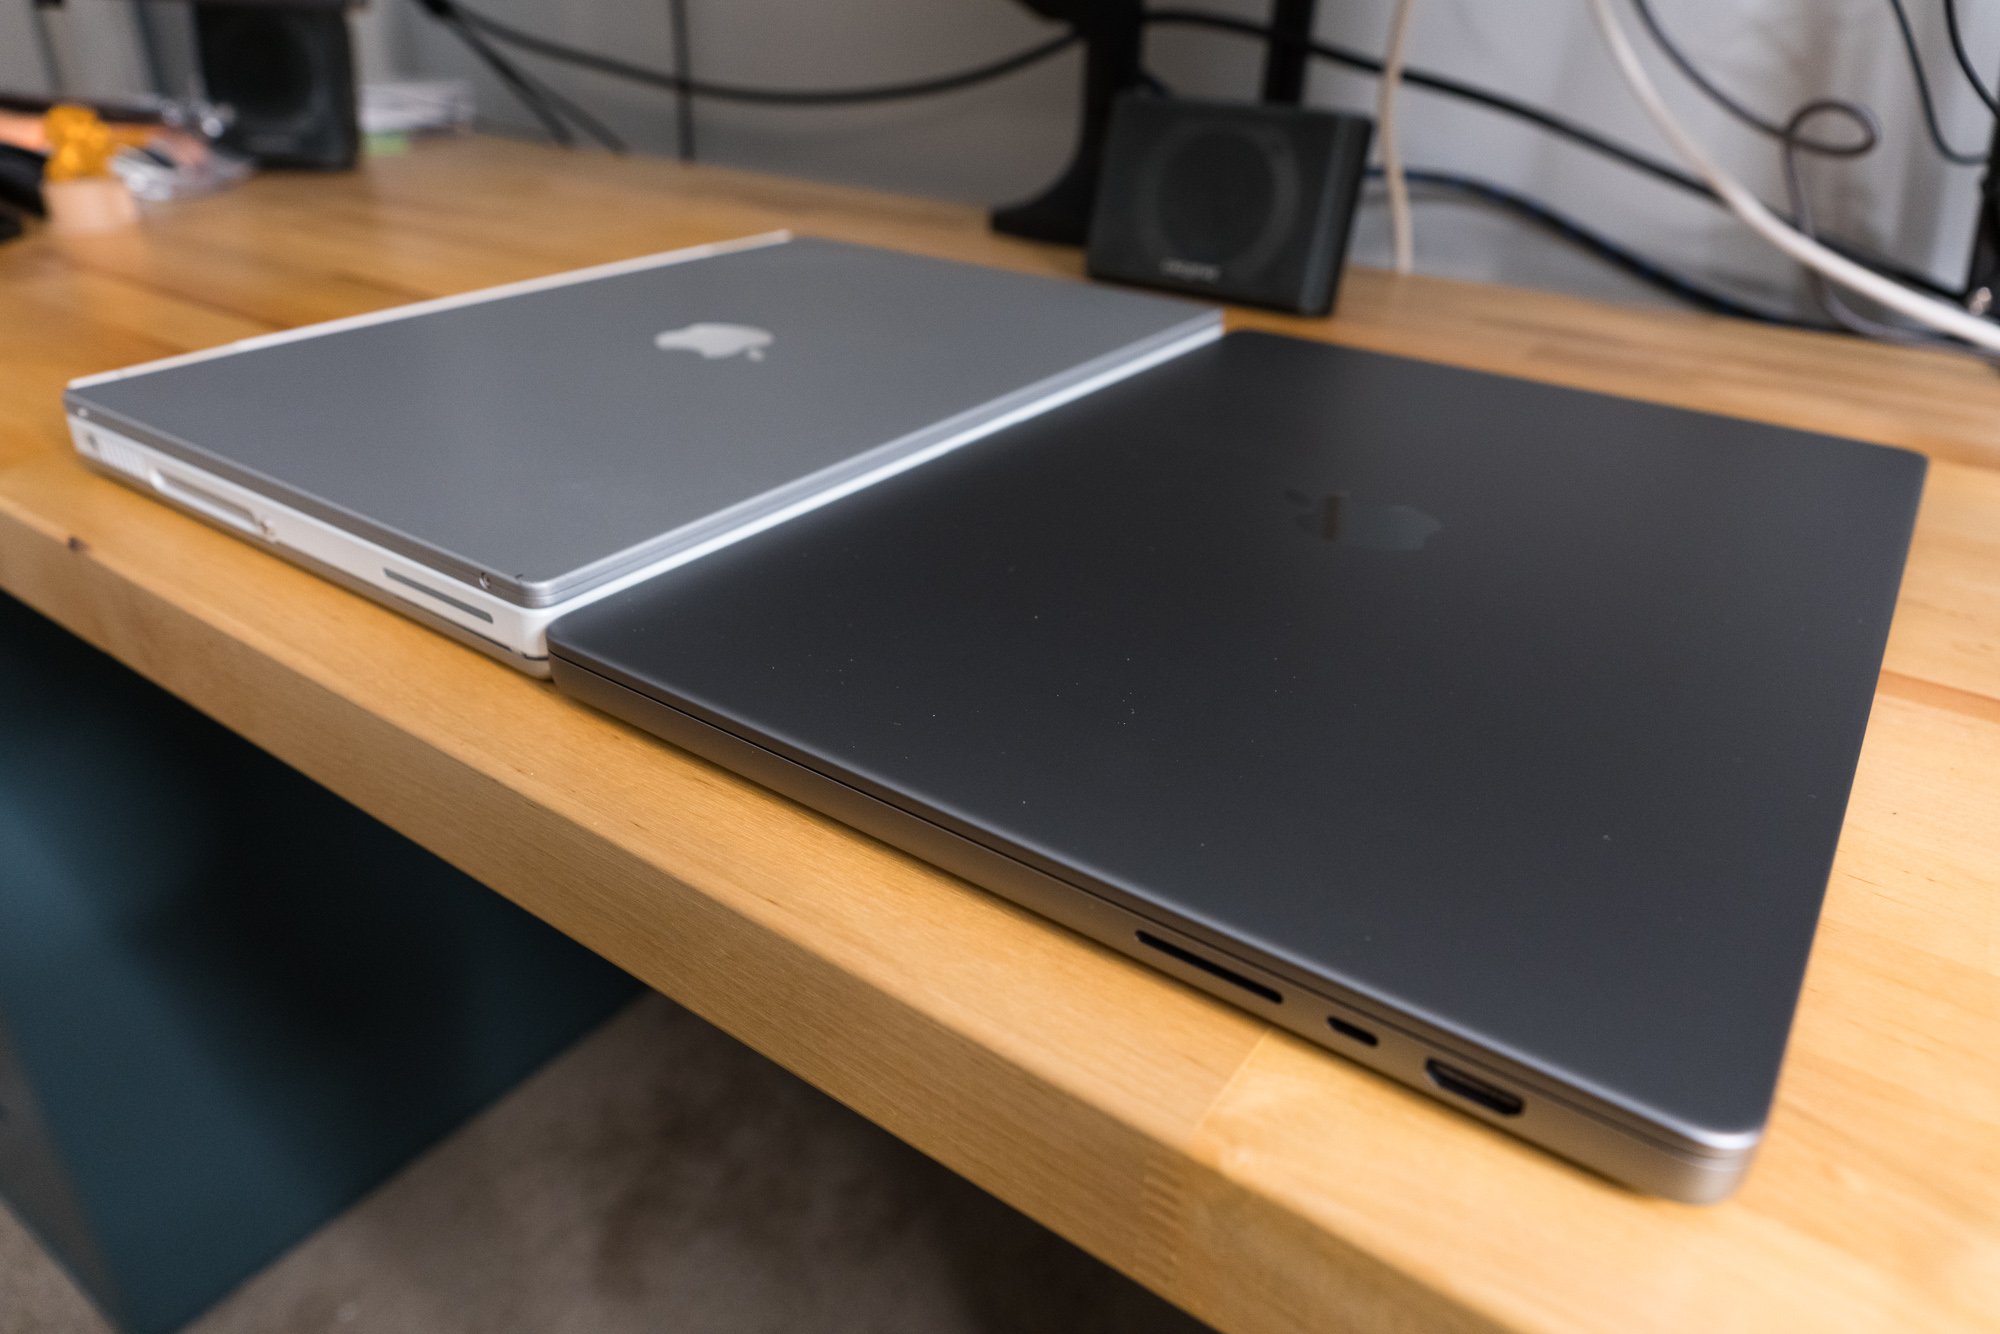
Instead of taking inspiration from the MacBook Air, the 2021 MacBook Pro looks elsewhere: the current iPad Pro, and the Titanium PowerBook G4. The new models are square and angular, yet rounded in all the right places. Subtle rounded corners and edges along the bottom are reminiscent of an iPod classic. A slight radius along the edge of the display feels exactly like the TiBook. Put it all together and you have a machine that maximizes the internal volume of its external dimensions. Visual tricks to minimize the feeling of thickness are set aside for practical concerns like thermal capacity, repairability, and connectivity.

I’m seeing double. Four PowerBooks!

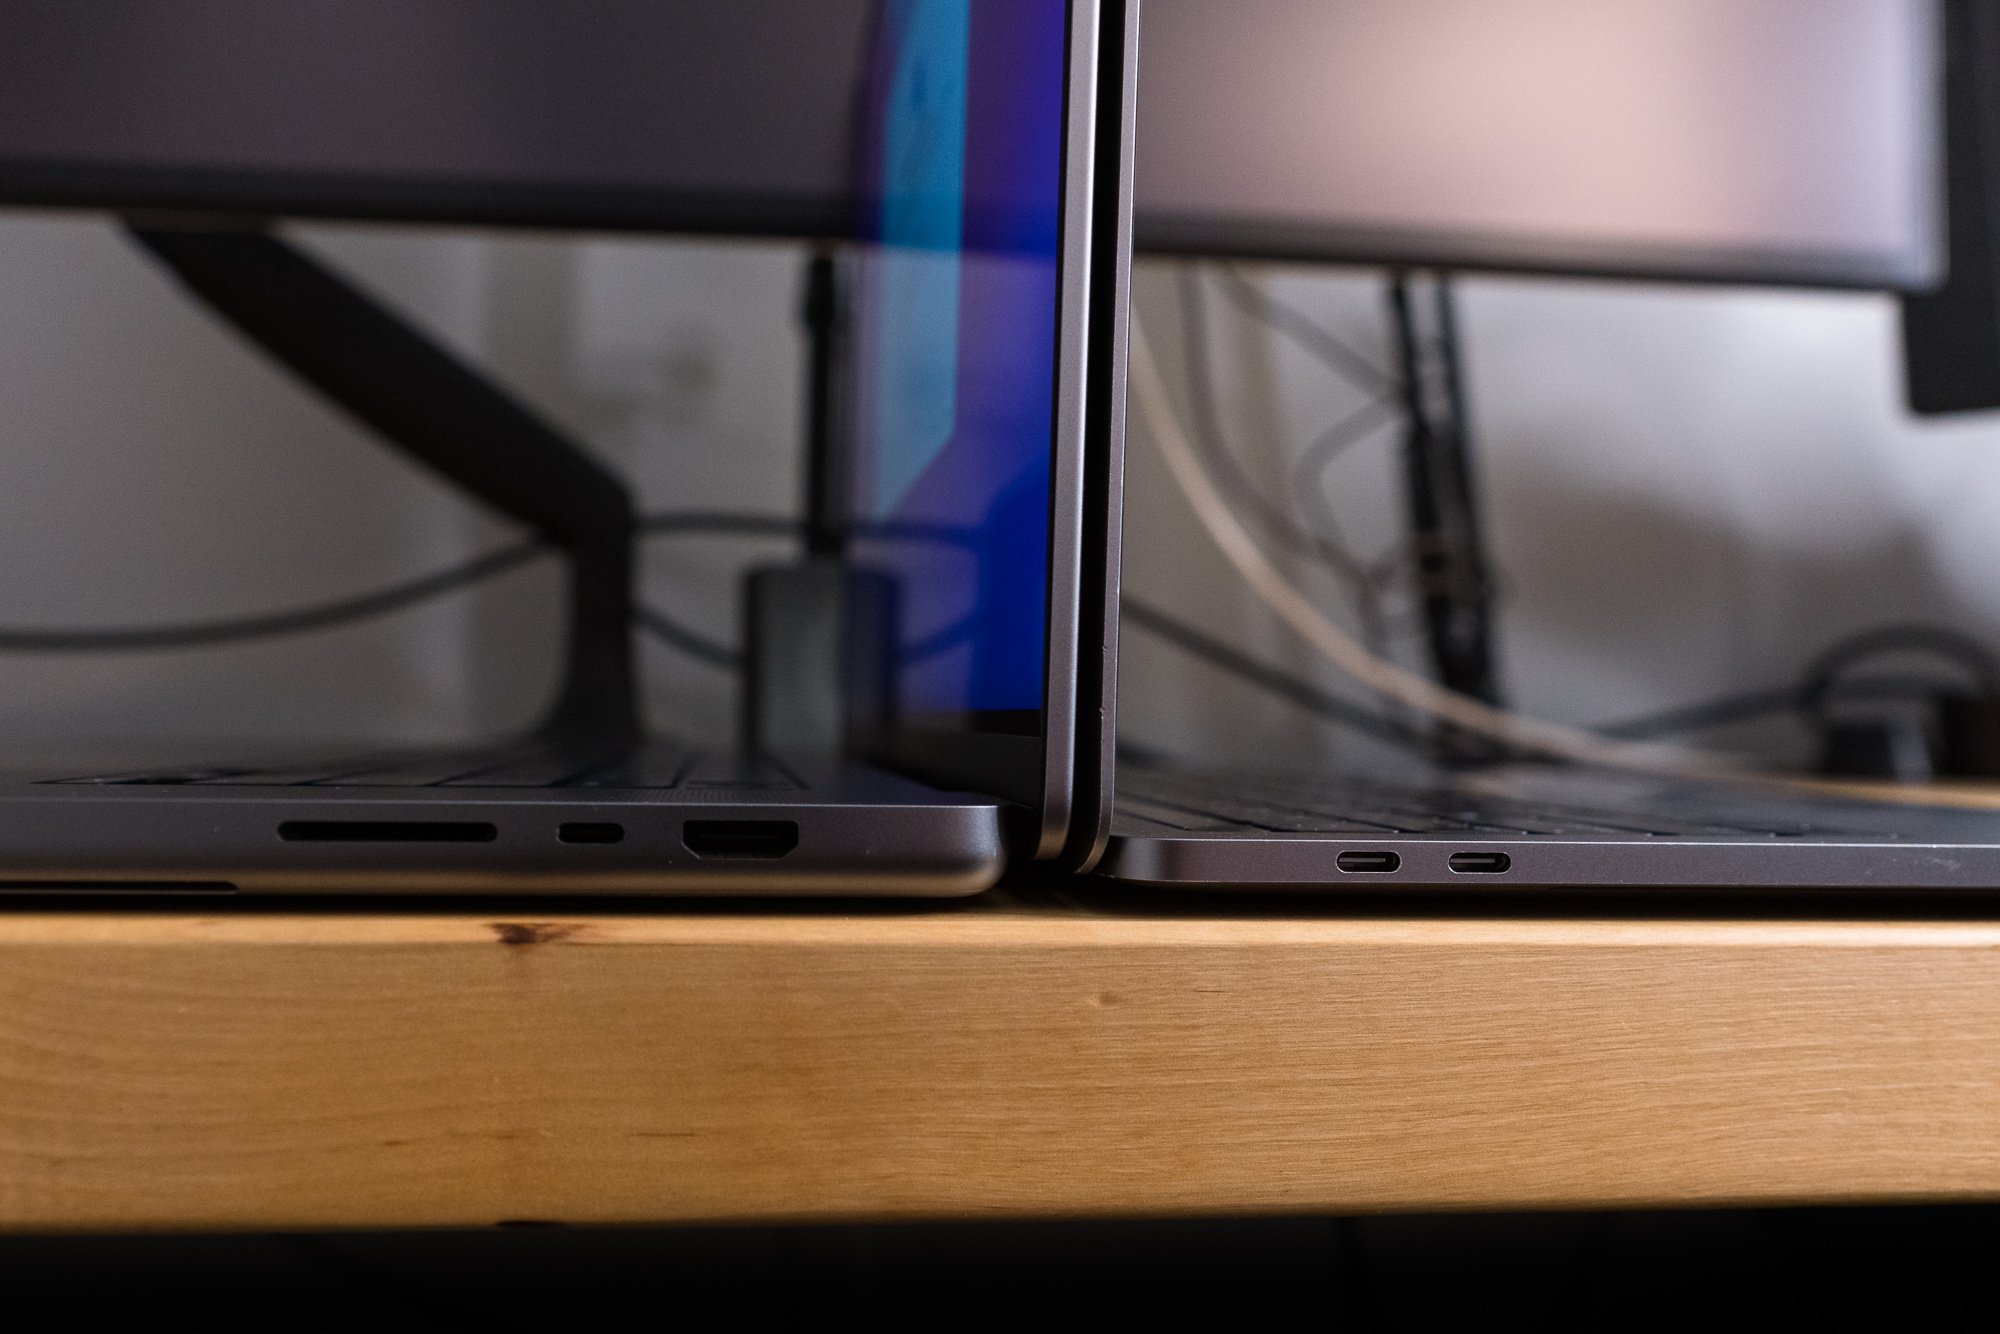
The downside of this approach is the computer feels significantly thicker in your hands. And yet the new 16 inch MacBook Pro is barely taller than its predecessor—.66 inches versus .64 (or 168mm versus 166). The 14 inch model is exactly the same thickness as its predecessor at .61 inches or 150mm. It feels thicker because the thickness is uniform, and there’s no hiding it when you pick it up from the table. The prior model's gentle, pillowy curves weren’t just for show—they made the machine feel thinner because the part you grabbed was thinner.

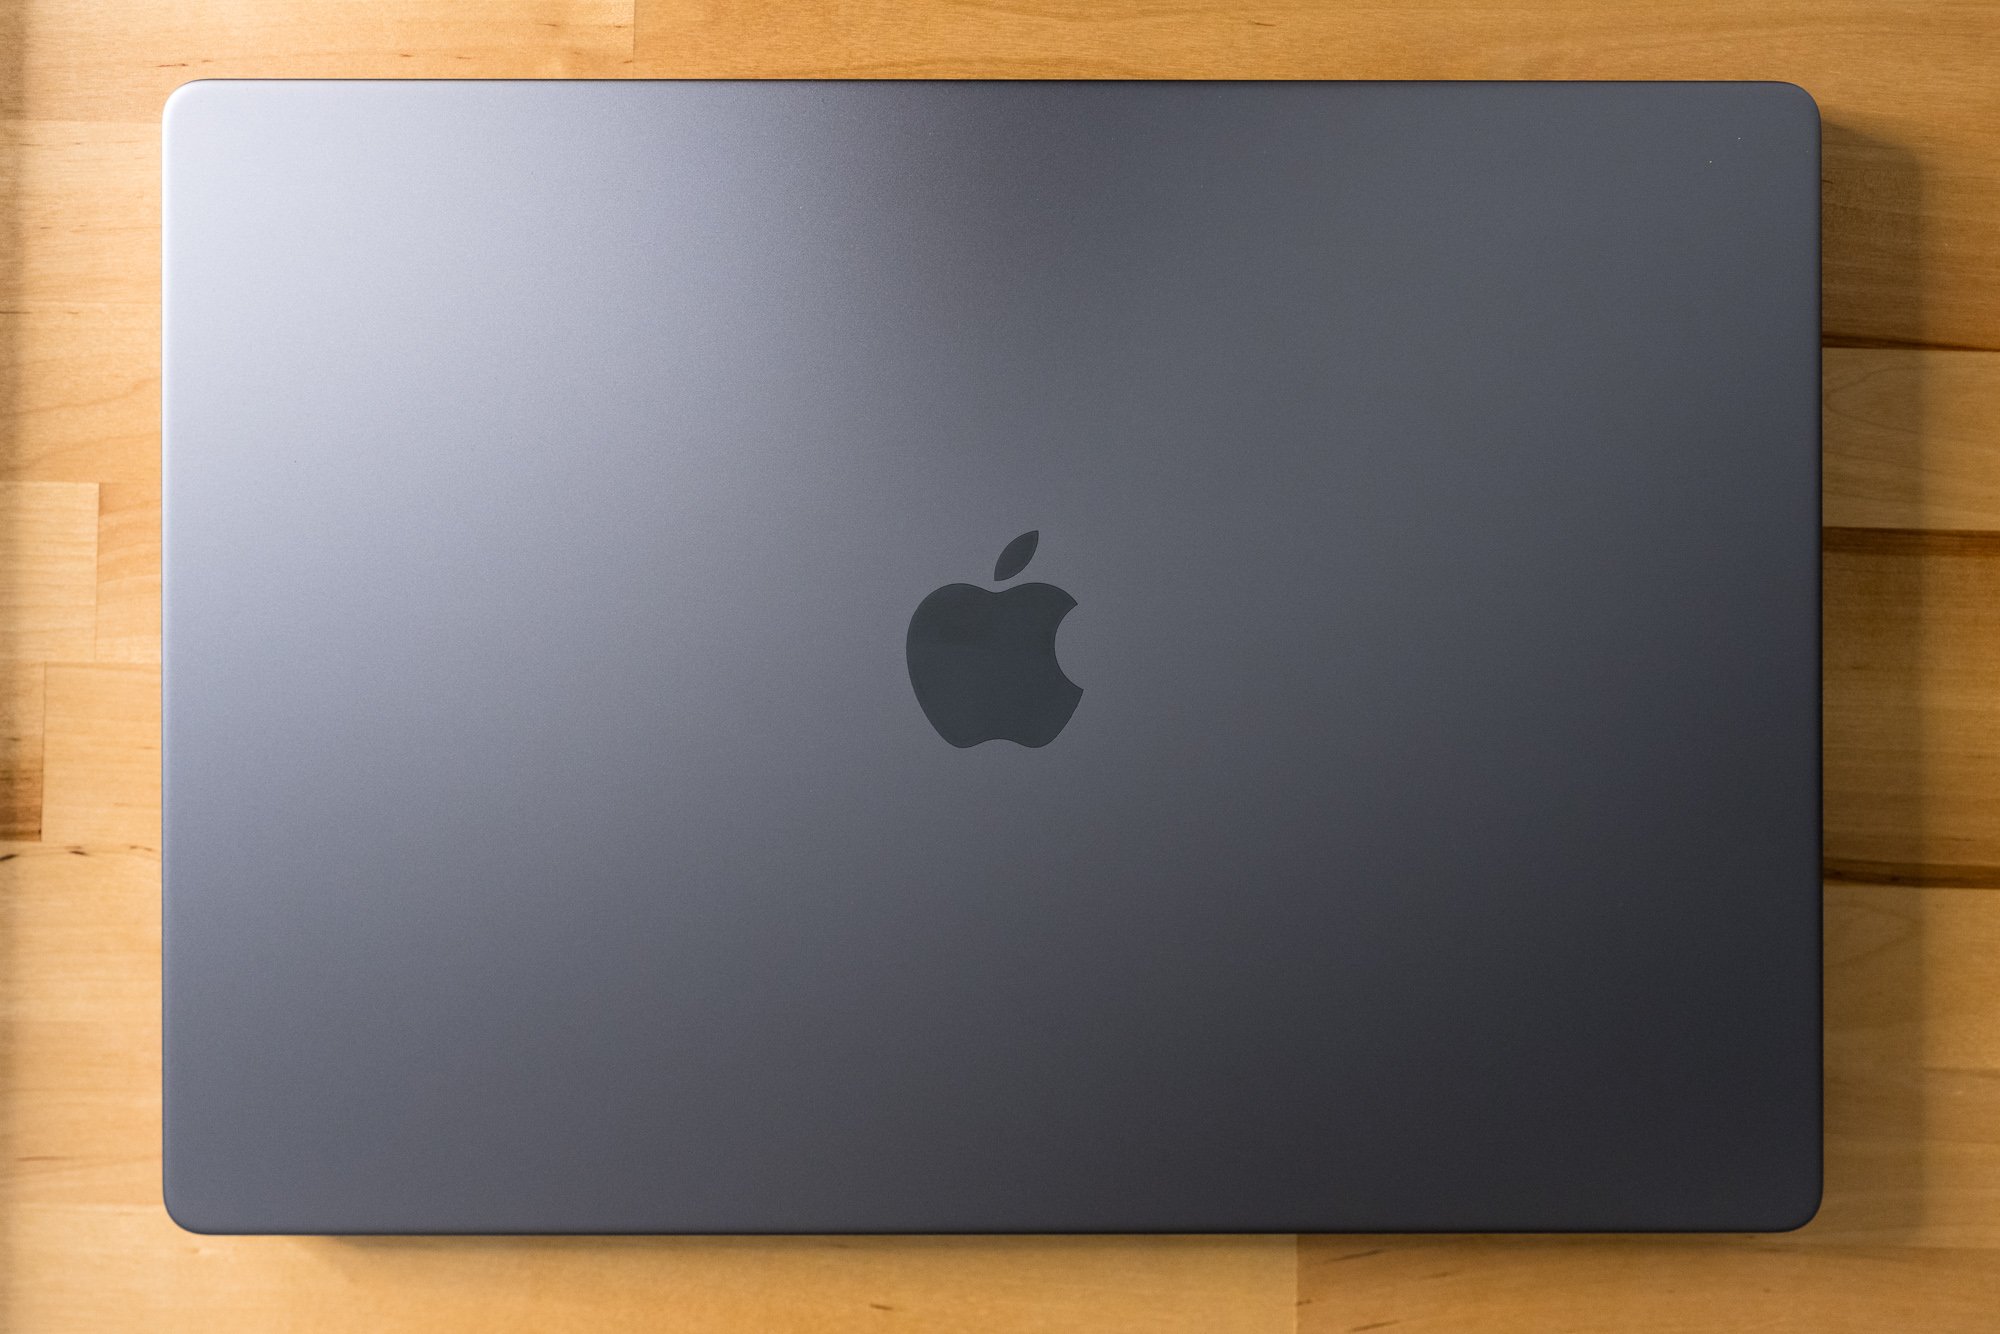
Memories of PowerBooks past are on display the moment you lift the notebook out of its box. I know others have made this observation, but it’s hard to miss the resemblance between the new MacBooks and the titanium PowerBook G4. As a fan of the TiBook’s aesthetics, I understand the reference. The side profiles are remarkably similar, with the same square upper body and rounded bottom edges. A perfectly flat lid with gently rolled edges looks and feels just like a Titanium. If only the new MacBook Pro had a contrasting color around the top case edges like the Titanium’s carbon-fiber ring—it really makes the TiBook look smaller than it is. Lastly, blacking out the keyboard well helps the top look less like a sea of silver or grey, fixing one of my dislikes about the prior 15 and 16 inchers.

What the new MacBook Pro doesn’t borrow from the Titanium are weak hinges and chassis flex. The redesigned hinge mechanism is smoother, and according to teardowns less likely to break display cables. It also fixes one of my biggest gripes: the dirt trap. On the previous generation MacBooks, the hinge was so close to the display that it created this crevice that seemed to attract every stray piece of lint, hair, and dust it could find. I resorted to toothbrushes and toothpicks to get the gunk out. Now, it’s more like the 2012 to 2015 models, with a wide gap and a sloping body join that lets the dust fall right out. Damp cloths are all it takes to clean out that gap, like how it used to be. That gap was my number one annoyance after the keyboard, and I thank whoever fixed it.

Something else you’ll notice if you’re coming from a 2016 through 2020 model is some extra mass. The 14 and 16 inch models, at 3.5 and 4.7 pounds respectively, have gained half a pound compared to their predecessors, which likely comes from a combination of battery, heatsink, metal, and screen. There’s no getting around that extra mass, but how you perceive it is a matter of distribution. I toted 2011 and 2012 13 inch models everywhere, and those weighed four and a half pounds. It may feel the same in a bag, but in your hands, the bigger laptop feels subjectively heavier. If you’re using a 2012 through 2015 model, you won’t notice a difference at all—the new 14 and 16 inch models weigh the same as the 13 and 15 inchers of that generation.

I don’t think Apple is going to completely abandon groundbreaking thin-and-light designs, but I do think they’re going to leave the envelope-pushing crown to the MacBook Air. There is one place Apple could throw us a bone on the style front, though, and that’s color choices. I would have bought an MBP in a “Special edition” color if they offered it, and I probably would have paid more too. Space Gray just isn’t dark enough for my tastes. Take the onyx black shade used in the keyboard surround and apply it to the entire machine—it would be the NeXT laptop we never had. I’d kill to have midnight green as well. Can’t win ‘em all, but I know people are dying for something other than “I only build in silver, and sometimes, very very dark gray.”

Alone Again, Notch-urally

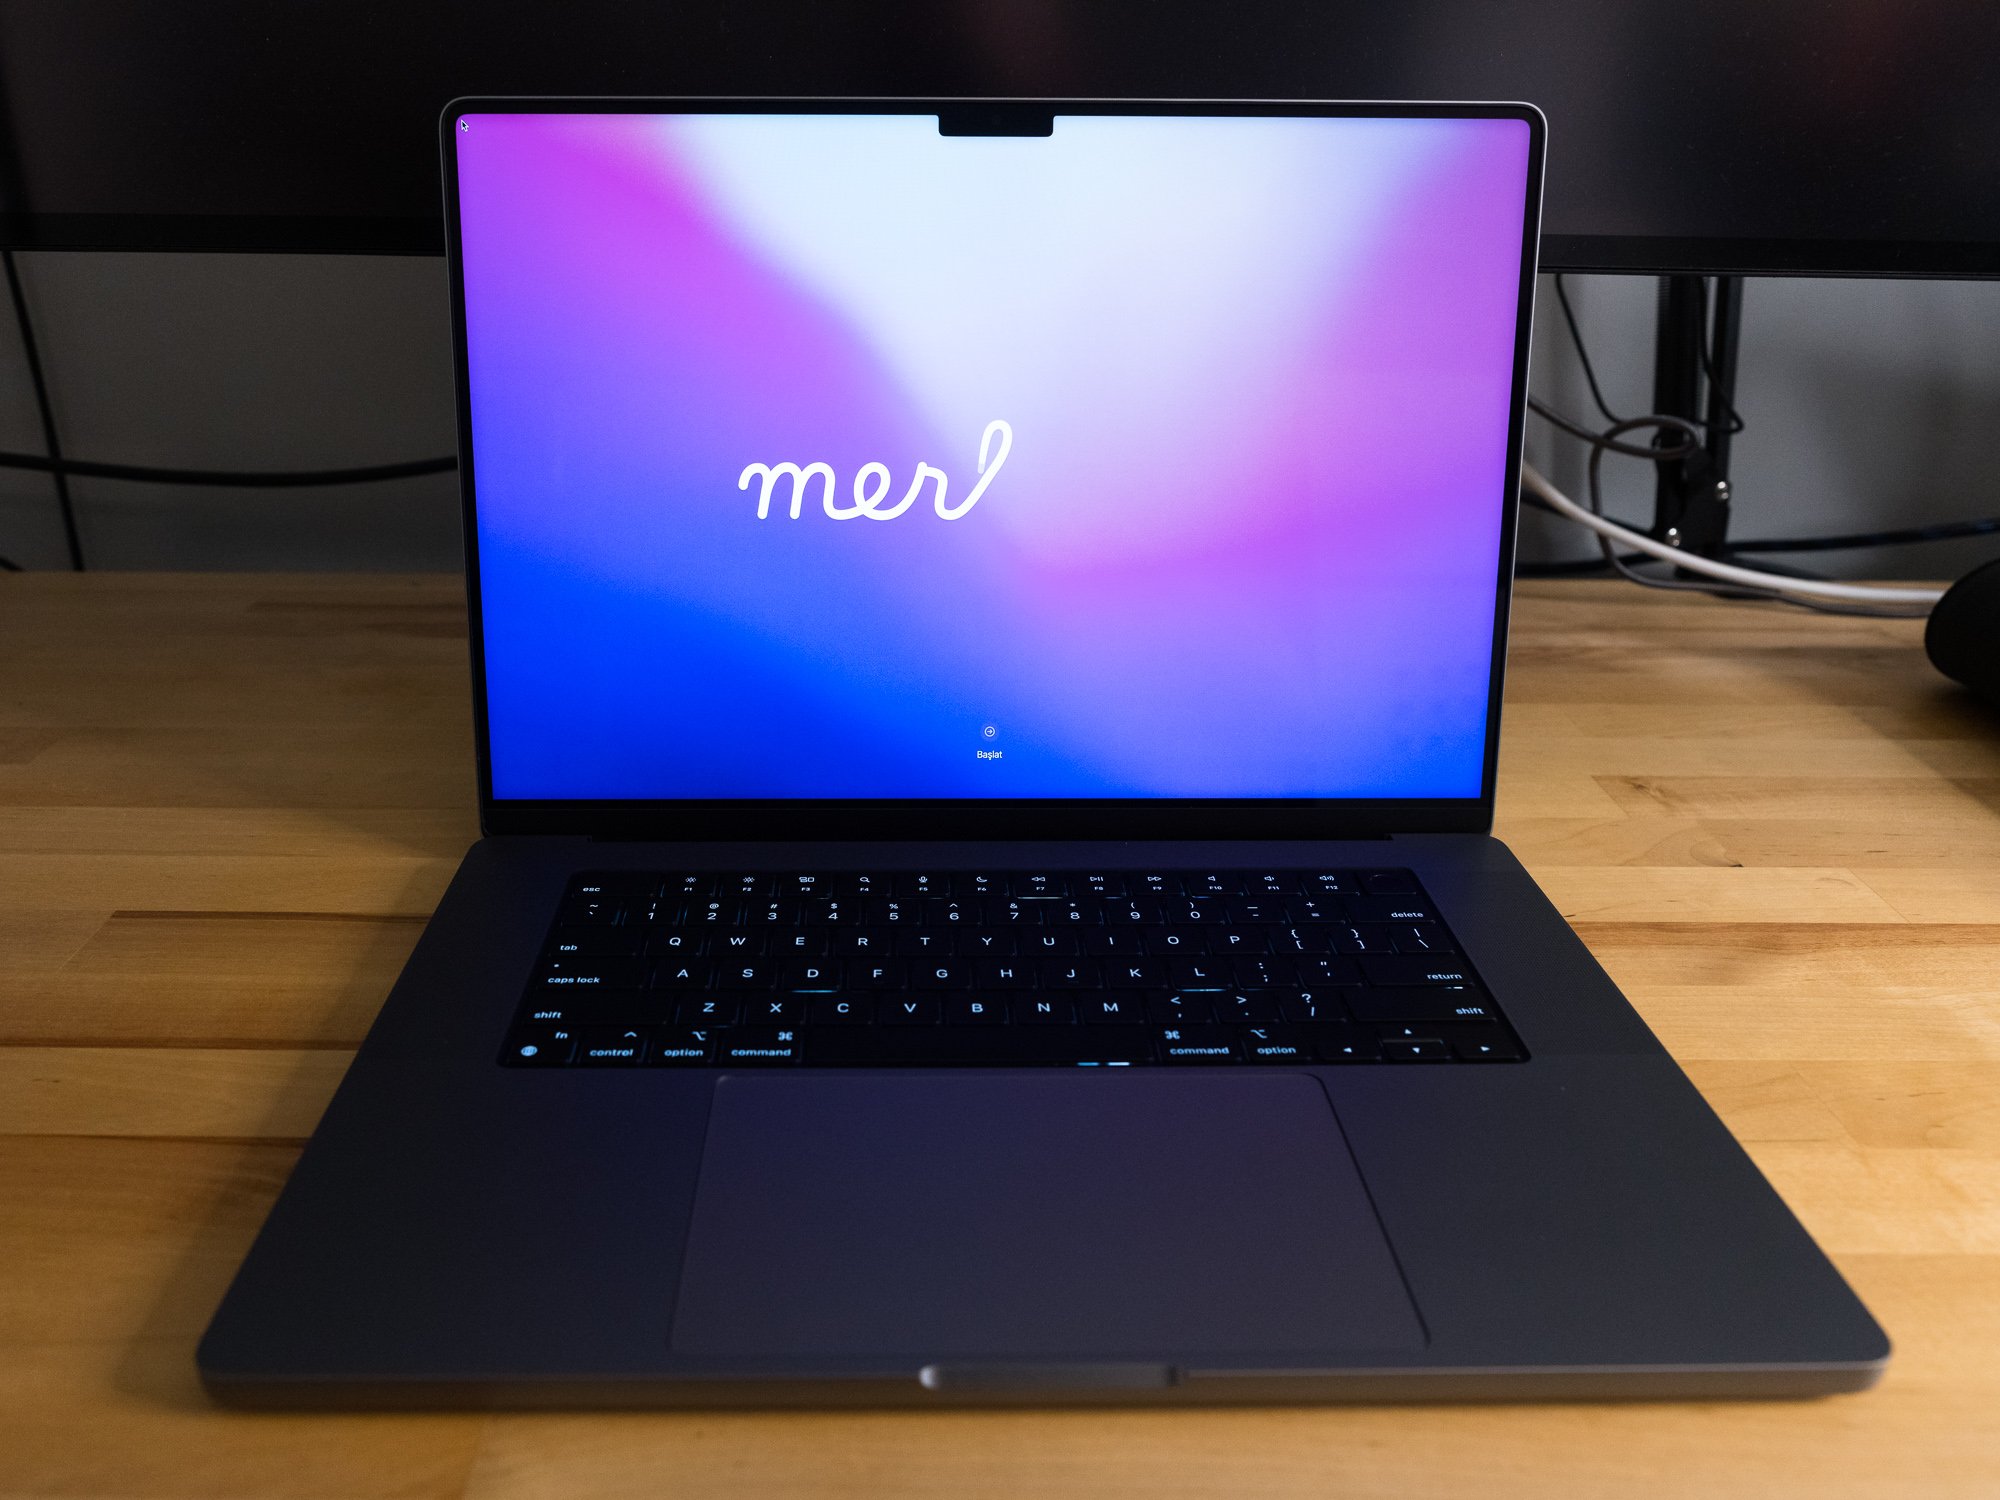
There’s no getting around it: I gotta talk about the webcam. Because some people decided that bezels are now qualita non grata on modern laptops, everyone’s been racing to make computers as borderless as possible. But the want of a bezel-free life conflicts with the need for videoconferencing equipment, and you can’t have a camera inside your screen… or can you? An inch and a half wide by a quarter inch tall strip at the top of the display has been sacrificed for the webcam in an area we’ve collectively dubbed “the notch.” Now the MacBook Pro has skinny bezels measuring 3/16s of an inch, at the cost of some menu bar area.

Oh, hello. I didn’t… see you there. Would you like some… iStat menu items?

Dell once tried solving this problem in 2015 by embedding a webcam in the display hinge of their XPS series laptops. There’s a reason nobody else did it—the camera angle captured a view straight up your nose. Was that tiny top bezel really worth the cost of looking terrible to your family or coworkers? Eventually Dell made the top bezel slightly taller and crammed the least objectionable tiny 720p webcam into it. When other competitors started shrinking their bezels, people asked why Apple couldn’t do the same. Meanwhile, other users kept complaining about Apple’s lackluster webcam video quality. The only way to get better image quality is to have a bigger sensor and/or a better lens, and both solutions take up space in all three axes. Something had to give, and the loyal menu bar took one for the team.

The menu bar’s been a fixture on Macintoshes since 1984—a one-stop shop for all your commands and sometimes questionable system add-ons. It’s always there, claiming 20 to 24 precious lines of vertical real estate. Apple’s usually conservative when it comes to changing how the bar looks or operates. When they have touched it, the reactions haven’t been kind. Center-aligned Apple logo in the Mac OS X Public Beta, anyone? Yet here we are, faced with a significant chunk of the menu bar’s lawn taken away by an act of eminent domain. As they say, progress has a price.

A few blurry pictures of a notched screen surfaced on MacRumors a few days before the announcement. I was baffled by the very idea. No way would Apple score such an own-goal on a machine that was trying to right all the wrongs of the past five years. They needed to avoid controversy, not create it! I couldn’t believe they would step on yet another rake. And yet, two days later, there was Craig Federighi revealing two newly benotched screens. I had to order up a heaping helping of roasted crow for dinner.

Now that the notch has staked its claim, what does that actually mean for prospective buyers? First, about an inch and a half of menubar is no longer available for either menus or menu extras. If an app menu goes into the notch, it’ll shift over to the right-hand side automatically. Existing truncation and hiding mechanisms in the OS help conserve space if both sides of your menu bar are full. Second, fullscreen apps won’t intrude into the menubar area by default. When an app enters fullscreen mode the menu bar slides away, the mini-LED backlights turn off, and the blackened area blends in with the remaining bezel and notch. It’s as if there was nothing at all—a pretty clever illusion! Sling your mouse cursor up top and menu items fade back in, giving you access to your commands. When you’re done, it fades to black again. If an app doesn’t play nice with the notch, you can check a box in Get Info to force it to scale the display below the notch.

Menu bar gif

How the menu bar fades and slides in fullscreen mode.

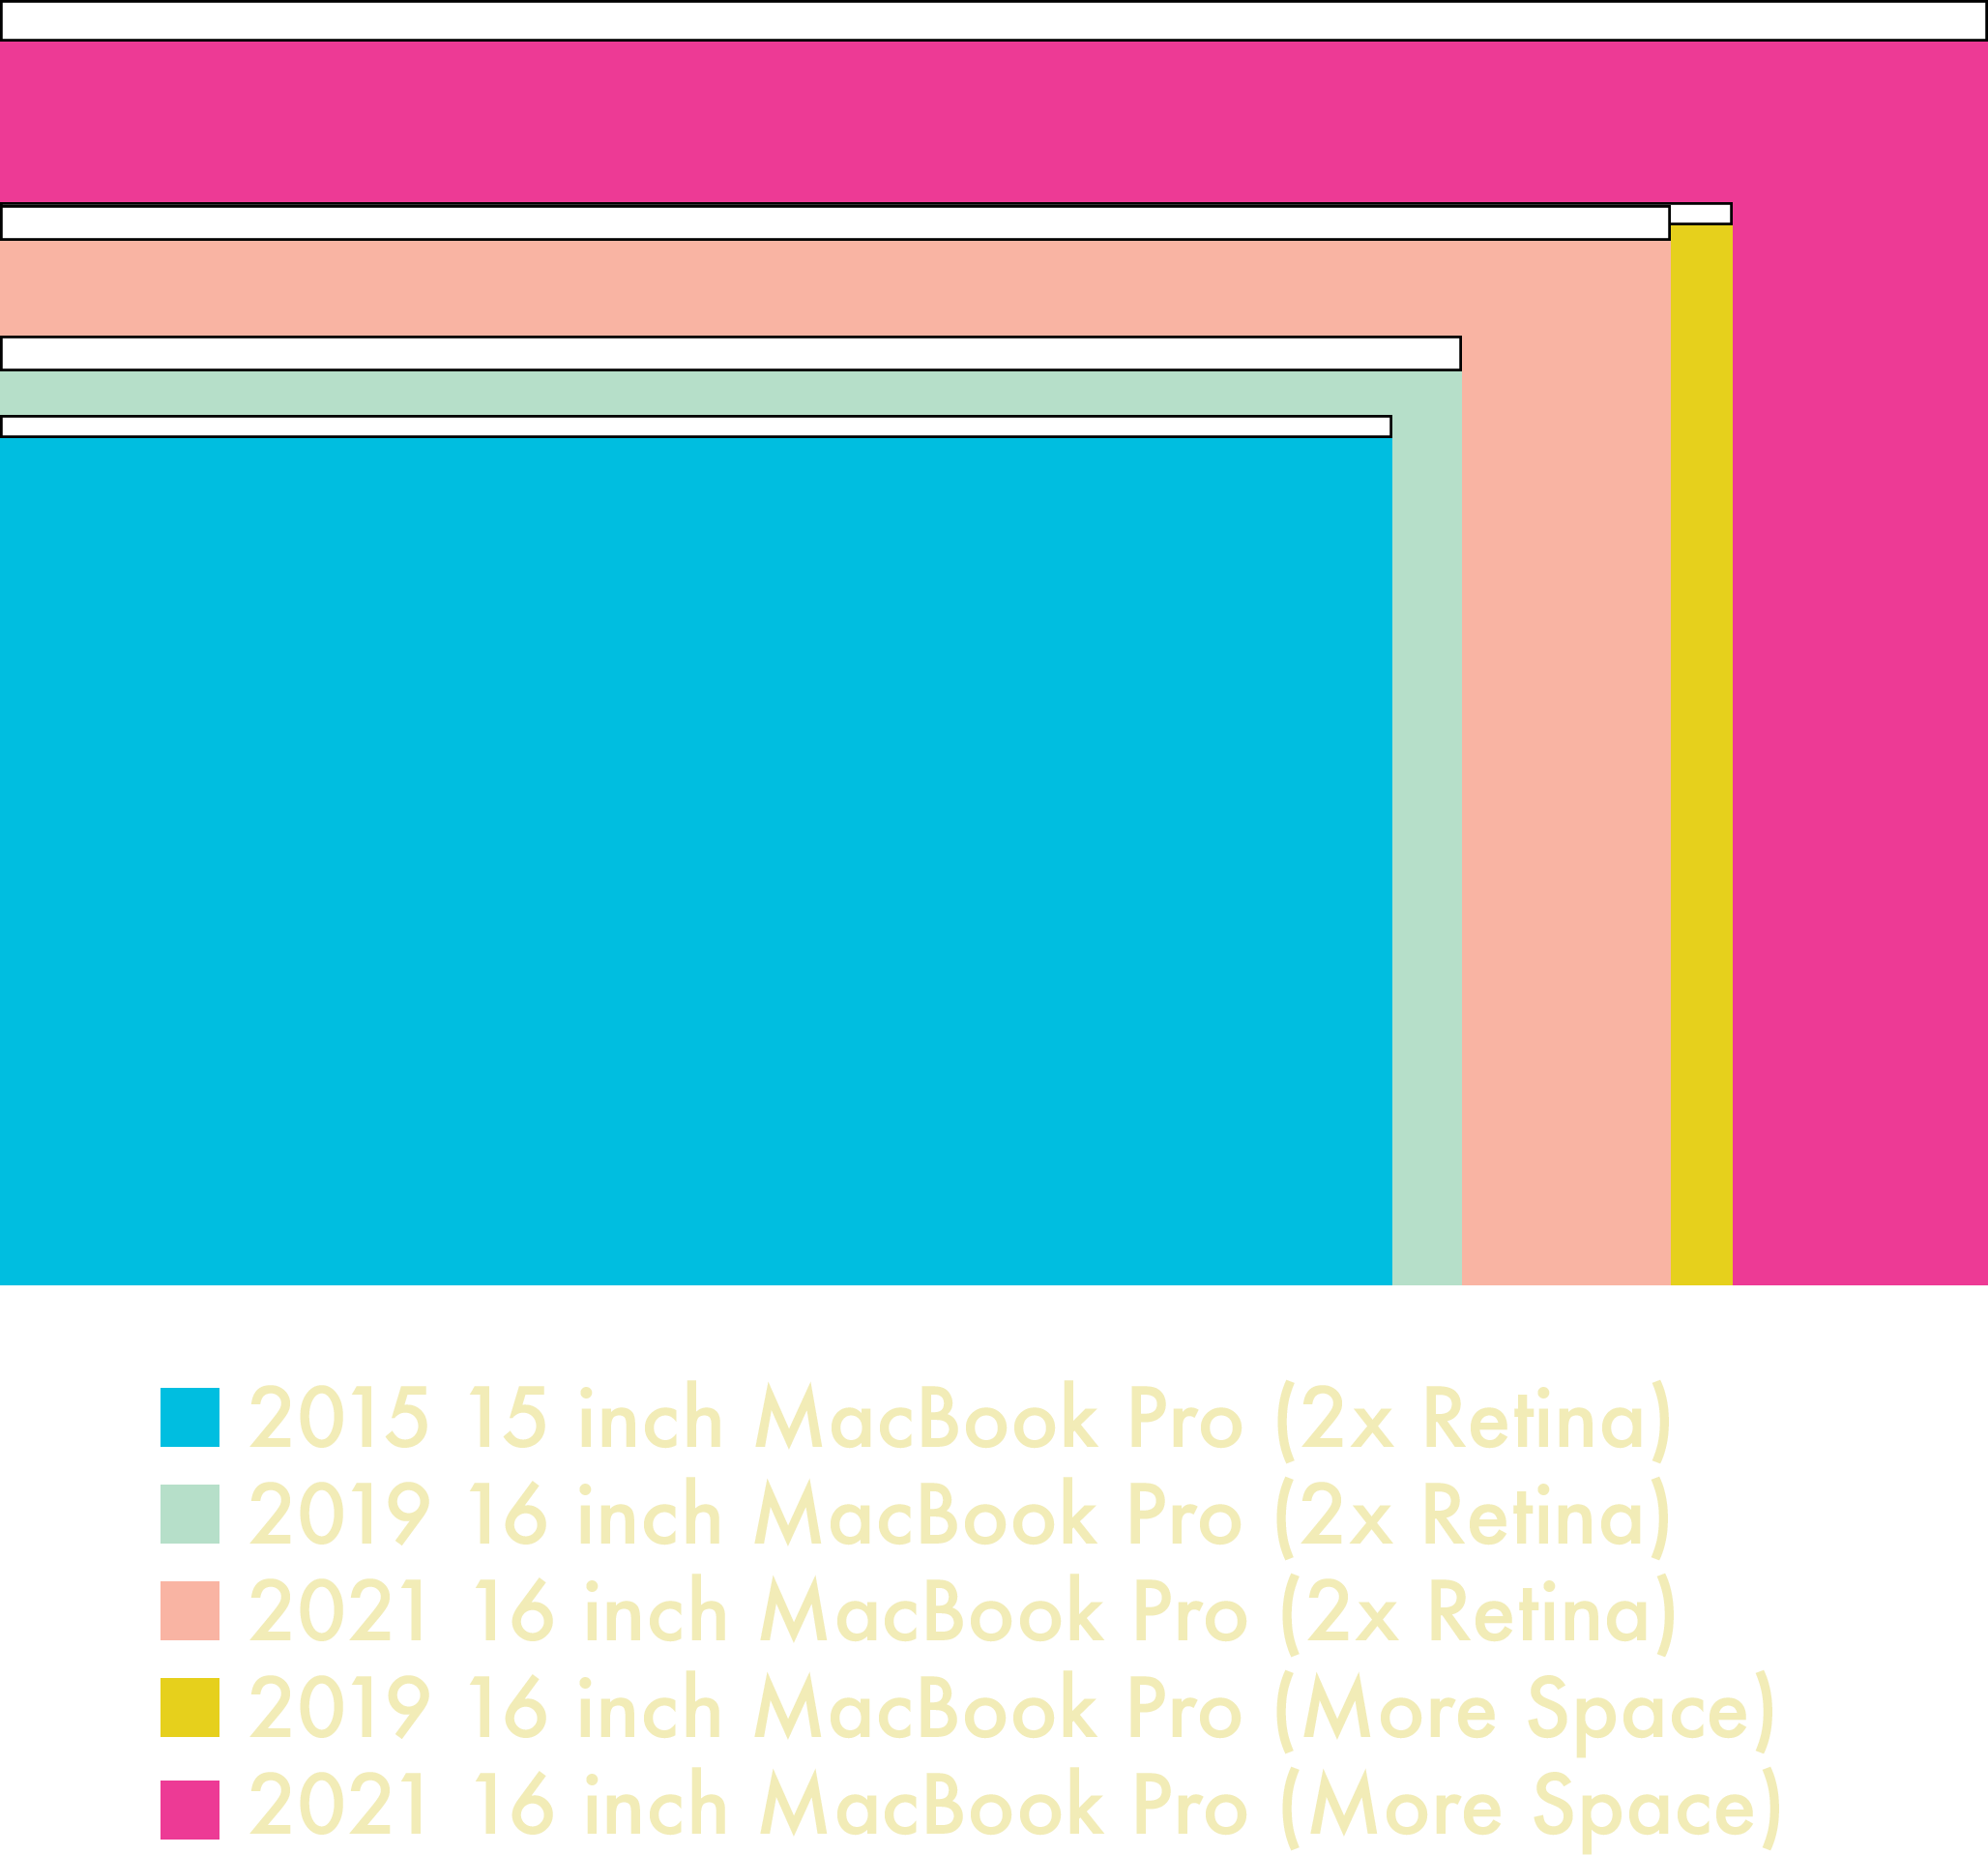
But are you losing any usable screen space due to the notch? Let’s do some math. The new 16 inch screen’s resolution is 3456 pixels wide by 2234 tall, compared to the previous model’s 3072 by 1920. Divide that by two for a native Retina scale and you get usable points of 1728 by 1117 versus 1536 by 960. So if you’re used to 2x integer scaling, the answer is no—you’re actually gaining vertical real estate with a notched Mac. Since I hate non-native scaling, I’ll take that as a win. If you’re coming from a prior generation 15 inch Retina MacBook Pro with a 1440 point by 900 display, that’s almost a 24 percent increase in vertical real estate. You could even switch to the 14 inch model and net more vertical space and save size and weight!

Working space

What did the menu bar give up to make this happen? The notch claims about ten percent of the menu bar on a 16 inch screen, and fifteen percent on a 14 inch. In point terms, it takes up about 188 horizontal points of space. Smaller displays are definitely going to feel the pinch, especially if you’re running a lot of iStat Menus or haven’t invested in Bartender. Some applications like Pro Tools have enough menus that they’ll spill over to the other side of the notch. With so many menus, you might trip Mac OS’ menu triage. It hides NSMenuBar items first, and then starts truncating app menu titles. Depending on where you start clicking, certain menu items might end up overlapping each other, which is disconcerting the first time you experience it. That’s not even getting into the bugs, like a menu extra sometimes showing up under the notch when it definitely shouldn’t. I think this is an area where Apple needs to rethink how we use menulings, menu extras, or whatever you want to call them. Microsoft had its reckoning with Status Tray items two decades ago, and Apple’s bill is way past due. On the flip side, if you’re the developer of Bartender, you should expect a register full of revenue this quarter.

Audacity's window menu scoots over.

Audacity’s Window menu scoots over to the other side of the notch atuomatically.

On the vertical side, the menu bar is now 37 points tall versus the previous 24 in 2x retina scale. Not a lot, but worth noting. It just means your effective working space is increased by 44 points, not 57. The bigger question is how the vertical height works in non-native resolutions. Selecting a virtual scaled resolution keeps the menu bar at the same physical size, but shrinks or grows its contents to match the scaling factor. It looks unusual, but if you’re fine with non-native scaling you’re probably fine with that too. The notch will never dip below the menu bar regardless of the scaling factor.

What about the camera? Has its quality improved enough to justify the land takings from the menu bar? Subjective results say yes, and you’ll get picture quality similar to the new iMac. People on the other side of my video conferences noticed the difference right away. iPads and iPhones with better front cameras will still beat it, but this is at least a usable camera versus an awful one. I’ve taken some comparison photos between my 2018 model, the new 2021 model, and a Logitech C920x, one of the most popular webcams on the market. It’s also a pretty old camera and not competitive to the current crop of $200+ “4K” webcams—and I use that term loosely—but it’s good enough quality for most people.

The 720p camera on the 2018 model is just plain terrible. The C920x is better than that, but it’s still pretty soft and has bluer white balance. Apple actually comes out ahead in this comparison in terms of detail and sharpness. Note that the new cameras field of view is wider than the old 720p camera—it’s something you’ll have to keep in mind.

Looking at the tradeoffs and benefits, I understand why Apple went with the notch. Camera quality is considerably improved, the bezels are tiny, and that area of the menu bar is dead space for an overwhelming majority of users. It doesn’t affect me much—I already use Bartender to tidy up my menu extras, and the occasional menu scooting to the other side of it is fine. Unless your menu extras consume half of your menu bar, the notch probably won’t affect your day to day Mac life either.

Bartender in action.

Without Bartender, I would have a crowded menu bar—regardless of a notch.

But there’s one thing we’ll all have to live with, and that’s the aesthetics. There’s a reason that almost all of Apple’s publicity photos on their website feature apps running in fullscreen mode, which conveniently blacks out the menubar area. All of Apple’s software tricks to reduce the downsides of the notch can’t hide the fact that it’s, well… ugly. If you work primarily in light mode, there’s no avoiding it. Granted, you’re not looking at the menu bar all the time, but when you do, the notch stares back at you. If you’re like me and you use dark mode with a dark desktop picture, then the darker menu bar has a camouflage effect, making the notch less noticeable. There’s also apps like Boring Old Menu Bar and Top Notch that can black out the menubar completely in light mode. Even if you don’t care about the notch, you might like the all-black aesthetic.

Is it worse than a bezel? Personally, I don’t hate bezels. It’s helpful to have some separation between your content and the outside world. I have desktop displays with bezels so skinny that mounting a webcam on top of them introduces a notch, which also grinds my gears. At least I can solve that problem by mounting the webcam on a scissor arm. I also like the chin on the iMac—everyone sticks Post-Its to it and that’s a valid use case. It’s also nice to have somewhere to grab to adjust the display angle without actually touching the screen itself. Oh, and the rounded corners on each side of the menu bar? They’re fine. In fact, they’re retro—just like Macs of old. Round corners on the top and square at the bottom is the best compromise on that front.

All the logic is there. And yet, this intrusion upon my display still offends me in some way. I can rationalize it all I want, but the full-screen shame on display in Apple’s promotional photos is proof enough that if they could get tiny bezels without the notch, they would. It’s a compromise, and nobody likes those. The minute Apple is able to deliver a notch-less experience, there will be much rejoicing. Until then, we’ll just have to deal with it.

We All Scream for HDR Screens

The new Liquid Retina ProMotion XDR display’s been rumored for years, and not just for the mouthful of buzzwords required to name it. It’s the first major advancement in image quality for the MacBook Pro since the retina display in 2012. Instead of using an edge-lit LED or fluorescent backlight, the new display features ten thousand individually addressable mini-LEDs behind the liquid crystal panel. If you’ve seen a TV with “adaptive backlighting zones,” it’s basically the same idea—the difference is that there’s a lot more zones and they’re a lot smaller. Making an array of tiny, powerful, efficient LEDs with great response time and proper color response isn’t trivial. Now do it all at scale without costs going out of control. No wonder manufacturers struggled with these panels.

According to the spec sheet, the 16 inch MacBook Pro’s backlight consists of 10,000 mini-LEDs. I’ll be generous and assume each is an individually addressable backlight zone. The 16.2 inch diagonal display, at 13.6 by 8.8 inches, has about 119.5 square inches of screen area that needs backlighting. With 10,000 zones, that results in about 83.6 mini-LEDs per square inch. Each square inch of screen contains 64,516 individual pixels. That means each LED is responsible for around 771 pixels, which makes for a zone area of 27.76 pixels squared. Now, I’m not a math guy—I’ve got an art degree. But if you’re expecting OLED per-pixel backlighting, you’ll need to keep waiting.

All these zones means adaptive backlighting—previously found on the Pro XDR display and the iPad Pro—is now a mainstream feature for Macs. Overall contrast is improved because blacks are darker and “dark” areas are getting less light than bright areas. It largely works as advertised—HDR content looks great. For average desktop use, you’ll see a noticeable increase in contrast across the board even at medium brightness levels.

Safari HDR support

Safari supports HDR video playback on youtube, and while you can’t see the effects in this screenshot, it looks great on screen.

But that contrast boost doesn’t come for free. Because backlight zones cover multiple pixels, pinpoint light sources will exhibit some amount of glow. Bright white objects moving across a black background in a dark room will show some moving glow effect as well. Higher brightness levels and HDR mode make the effect more obvious. Whether this affects you or not depends on your workflow. The problem is most noticeable with small, bright white objects on large black areas. If you want a surefire way to demonstrate this, open up Photoshop, make a 1000x1000 document of just black pixels, and switch to the hand tool. Wave your cursor around the screen and you’ll see the subtle glow that follows the cursor as it moves. Other scenarios are less obvious—say, if you use terminal in dark mode. Lines of text will be big enough that they straddle multiple zones, so you may see a slight glow. I don’t think the effect is very noticeable unless you are intentionally trying to trigger it or you view a lot of tiny, pure white objects on a black screen in a dark room. I’ve only noticed it during software updates and reboots, and even then it is very subtle.
Watch this on a Mini-LED screen to see the glow effect. It’s otherwise unnoticeable in daily usage.

I don’t think this is a dealbreaker—I don’t work with tiny white squares on large black backgrounds all day long. But if you’re into astrophotography, you might want to try before you buy. Edge-lit displays have their own backlight foibles too, like piano keys and backlight uniformity problems, which mini-LEDs either eliminate or reduce significantly. Even CRTs suffered from bloom and blur, not to mention convergence issues. It’s just a tradeoff that you’ll have to judge. I believe the many positives will outweigh the few negatives for a majority of users.

The other major change with this screen and Mac OS Monterey is support for variable refresh rates. With a maximum refresh rate of 120Hz, the high frame rate life is now mainstream on the Mac. If you’re watching cinematic 24 frames per second content, you’ll notice the lack of judder right away. Grab a window and drag it around the screen and you’ll see how smooth it is. Most apps that support some kind of GPU rendering with vsync will yield good results. Photoshop’s rotate view tool is a great example—it’s smooth as butter. System animations and most scrolling operations are silky smooth. A great example is using Mission Control—the extra frames dramatically improve the shrinking and moving animations. Switching to fullscreen mode has a similar effect.

But the real gotcha is that most apps don’t render their content at 120 FPS. It’s a real mixed bag out there at the moment, and switching between a high frame rate app to a boring old 60Hz one is jarring. Safari, for instance, is stuck at 60 FPS. This is baffling, because a browser is the most used application on the system. Hopefully it’s fixed in 12.1.

But pushing frames is just one part of a responsive display. Pixel response time is still a factor in LCD displays, and Apple tends to use panels that are middle of the pack. Is the new MacBook Pro any different? My subjective opinion is that the 16 inch MBP is good, but not great in terms of pixel response. Compared to my ProMotion equipped 2018 iPad Pro, the Mac exhibits a lot less ghosting. Unfortunately, it’s not going to win awards for pixel response time. Until objective measurements are available, I’m going to hold off from saying it’s terrible, but compared to a 120 or 144Hz gaming-focused display, you’ll notice a difference. 

In addition to supporting variable and high refresh rates on the internal screen, the new MacBooks also support DisplayPort adaptive refresh rates—what you might know as AMD’s FreeSync. Plug in a FreeSync or DisplayPort adaptive refresh display using a Thunderbolt to DisplayPort cable and you’ll be able to set the refresh rate along with adaptive sync. Unfortunately, Adaptive Sync doesn’t work via the built-in HDMI port, because HDMI Variable Refresh Rate requires an HDMI 2.1 port. Also, Apple’s implemented the DisplayPort standard, and FreeSync over HDMI 2.0 is proprietary to AMD. I’m also not sure if Thunderbolt to HDMI 2.1 adapters will work either, because I don’t have one to test.

LG Display Prefs

The LG 5K2K Ultrawide works perfectly with these Macs and Monterey.

Speaking of external displays, I have a bunch that I tested with the M1 Max. The good news is that my LG 5K ultrawide works perfectly fine when attached via Thunderbolt. HiDPI modes are available and there’s no issues with the downstream USB ports. The LG 5K ultrawide is the most obscure monitor I own, so this bodes well for other ultrawide displays, but I can’t speak definitively about those curved ultrawides that run at 144Hz. I wasn’t able to enable HDR output, and I believe this is due to a limitation of the display’s Thunderbolt controller—if I had a DisplayPort adapter, it might be different. My Windows PC attached via DisplayPort switches to HDR just fine. I can’t definitely call it until tested that way. My aging Wacom Cintiq 21UX DTK2100 works just fine with an HDMI to DVI adapter. An LG 27 inch 4K display works well over HDMI, and HDR is supported there too. The only missing feature with the LG 4K is Adaptive Sync, which requires a DisplayPort connection from this Mac. Despite that, you can still set a specific refresh rate via HDMI.

If multi-monitor limitations kept you away from the first round of M1 Macs, those limits are gone. The M1 Pro supports two 6K external displays, and the Max supports three 6K displays plus a 4K60 over HDMI. I was indeed able to hook up to three external displays, and it worked just like on my Intel Macs. I did run into a few funny layout bugs with Monterey’s new display layout pane, which I’m sure will be ironed out in time. Or not—you never know what Apple will fix these days.

This happened a few times. Sometimes it fixed itself after a few minutes, other times it just sat there.

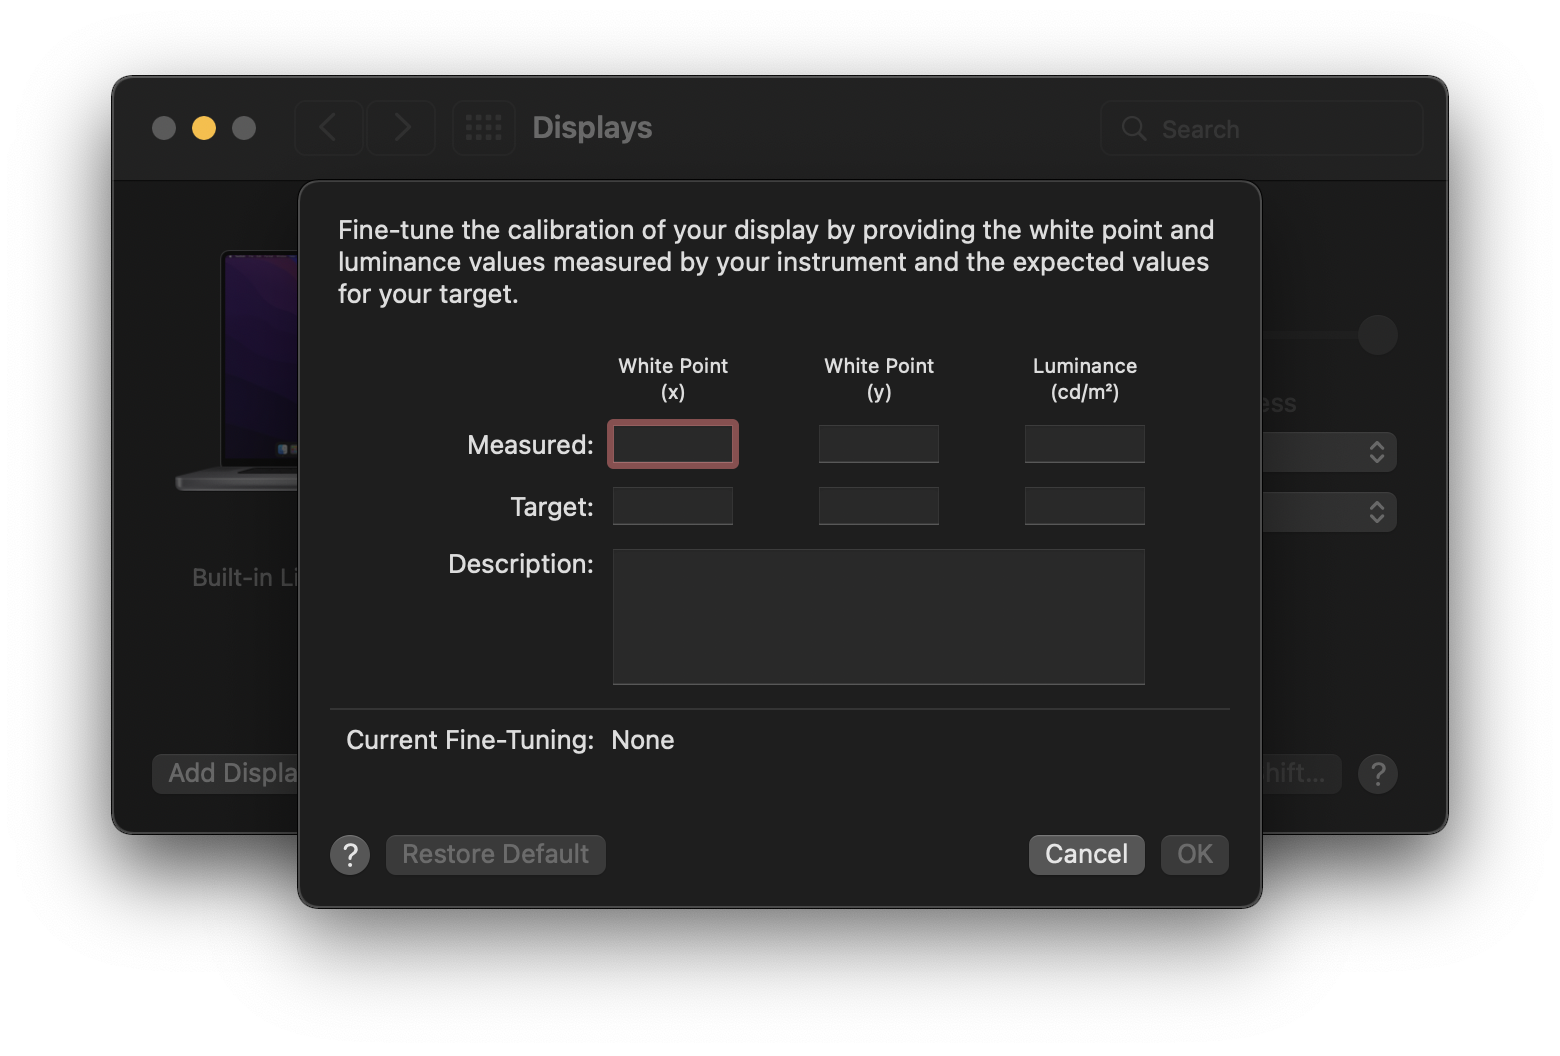
How about calibration? Something I’ve seen floating around is that “The XDR displays can’t be hardware calibrated,” and that’s not true. What most people think of as “hardware calibrating” is actually profiling, where a spectrophotometer or colorimeter is used to linearize and generate a color profile for managing a display’s color. You are using a piece of hardware to do the profiling, but you’re not actually calibrating anything internal to the monitor. For most users, this is fine—adjusting the color at the graphics card level does the job. For very demanding users, this isn’t enough, and that’s why companies like NEC and Eizo sell displays with hardware LUTs that can be calibrated by very special—and very expensive—equipment.

You can still run X-Rite i1 Profiler and use an i1 Display to generate a profile, and you can still assign it to a display preset. But the laptop XDR displays now have the same level of complexity as the Pro Display XDR when it comes to hardware profiles. You can use a spectroradiometer to fine-tune these built-in picture modes for the various gamuts in System Preferences, and Apple has a convenient support document detailing this process. This is not the same thing as a tristimulus colorimeter, which is what most people think of as a “monitor calibrator!” I’m still new to this, so I’m still working out the process. I’m used to profiling traditional displays for graphic arts, so these video-focused modes are out of my wheelhouse. I’ll be revisiting the subject of profiling these displays in a future episode.

Fine tune calibration

Here there be dragons, if you’re not equipped with expensive gear.

Related to this, a new (to me) feature in System Preference’s Display pane is a Display Presets feature, allowing you choose different gamut and profile presets for the display. This was only available previously for the Pro Display XDR, but a much wider audience will see these for the first time thanks to the MacBook Pro. Toggling between different targets is a handy shortcut, even though I don’t think I’ll ever use it. The majority are video mode simulations, and since I’m not a video editor, they don’t mean much to me. If they matter to you, then maybe the XDR might make your on-the-go editing a little easier.

Bye Bye, Little Butterfly

When the final MacBook with a butterfly keyboard was eliminated from Apple’s portable lineup in the spring of 2020, many breathed a sigh of relief. Even if you weren’t a fan of the Dongle Life, you’d adjust to it. But a keyboard with busted keys drives me crazier than Walter White hunting a troublesome fly. The costs of the butterfly keyboard were greater than what Apple paid in product service programs and warranty repairs. The Unibody MacBook Pro built a ton of mind- and marketshare for Apple on the back of its structural integrity. It’s no ToughBook, but compared to the plasticky PC laptops and flexible MacBook Pro of 2008, it was a revelation. People were buying Macs just to run Windows because they didn’t crumble at first touch. All that goodwill flew away thanks to the butterfly effect. Though Apple rectified that mistake in 2020, winning back user trust is an uphill battle.

Part of rebuilding that trust is ditching the Touch Bar, the 2016 models’ other controversial keyboard addition. The 2021 models have sent the OLED strip packing in favor of full-sized function keys. Apple has an ugly habit of never admitting fault. If they made a mistake—like the Touch Bar—they tend to frame a reversion as “bringing back the thing you love, but now it’s better than ever!” That’s exactly what Apple’s done with the function keys—these MacBooks are the first Apple laptop to feature full-height function keys. Lastly, the Touch ID-equipped power button gets an upgrade too—it’s now a full sized key with a guide ring.

Keyboard 2 Keyboard.

How does typing feel on this so-called “Magic” keyboard? I didn’t have any of the Magic keyboard MacBooks, but I do have a desktop Magic keyboard that I picked up at the thrift store for five bucks. It feels nearly the same as that desktop keyboard in terms of travel. It felt way more responsive than a fresh butterfly keyboard, and I’m happy for the return of proper arrow keys.  Keyboards are subjective, and if you’re unsure, try it yourself. If you’re happy with 2012 through 2015 MacBook Pro keyboards, you’ll be happy with this one. My opinion on keyboards is that you shouldn’t have to think about them. Whatever switch type works for you and lets your fingers fly is the right keyboard for you. My preferred mechanical switch is something like a Cherry Brown, though I’ve always had an affinity for the Alps on the Apple Extended Keyboard II and IBM’s buckling springs.

Since the revised keyboard introduced in the late 2019 to spring 2020 notebooks hasn’t suffered a sea of tweets and posts claiming it’s the worst keyboard ever, it’s probably fine. I’m ready to just not think about it anymore. My mid-2018 MacBook Pro had a keyboard replacement in the fall of 2019. It wasn’t even a year old—I bought it in January 2019! That replacement keyboard is now succumbing to bad keys, even though it features the “better” butterfly switches introduced in the mid-2019 models. My N key’s been misbehaving since springtime, and I’ve nursed it along waiting for a worthy replacement. On top of mechanical failures, the legends flaked off a few keys, which had never happened to me before on these laser-etched keycaps. With all of the problems Apple’s endured, will the new keyboard be easier to repair? Based on teardown reports, replacing the entire keyboard is still a very involved process, but at least you can remove keycaps again without breaking the keys.

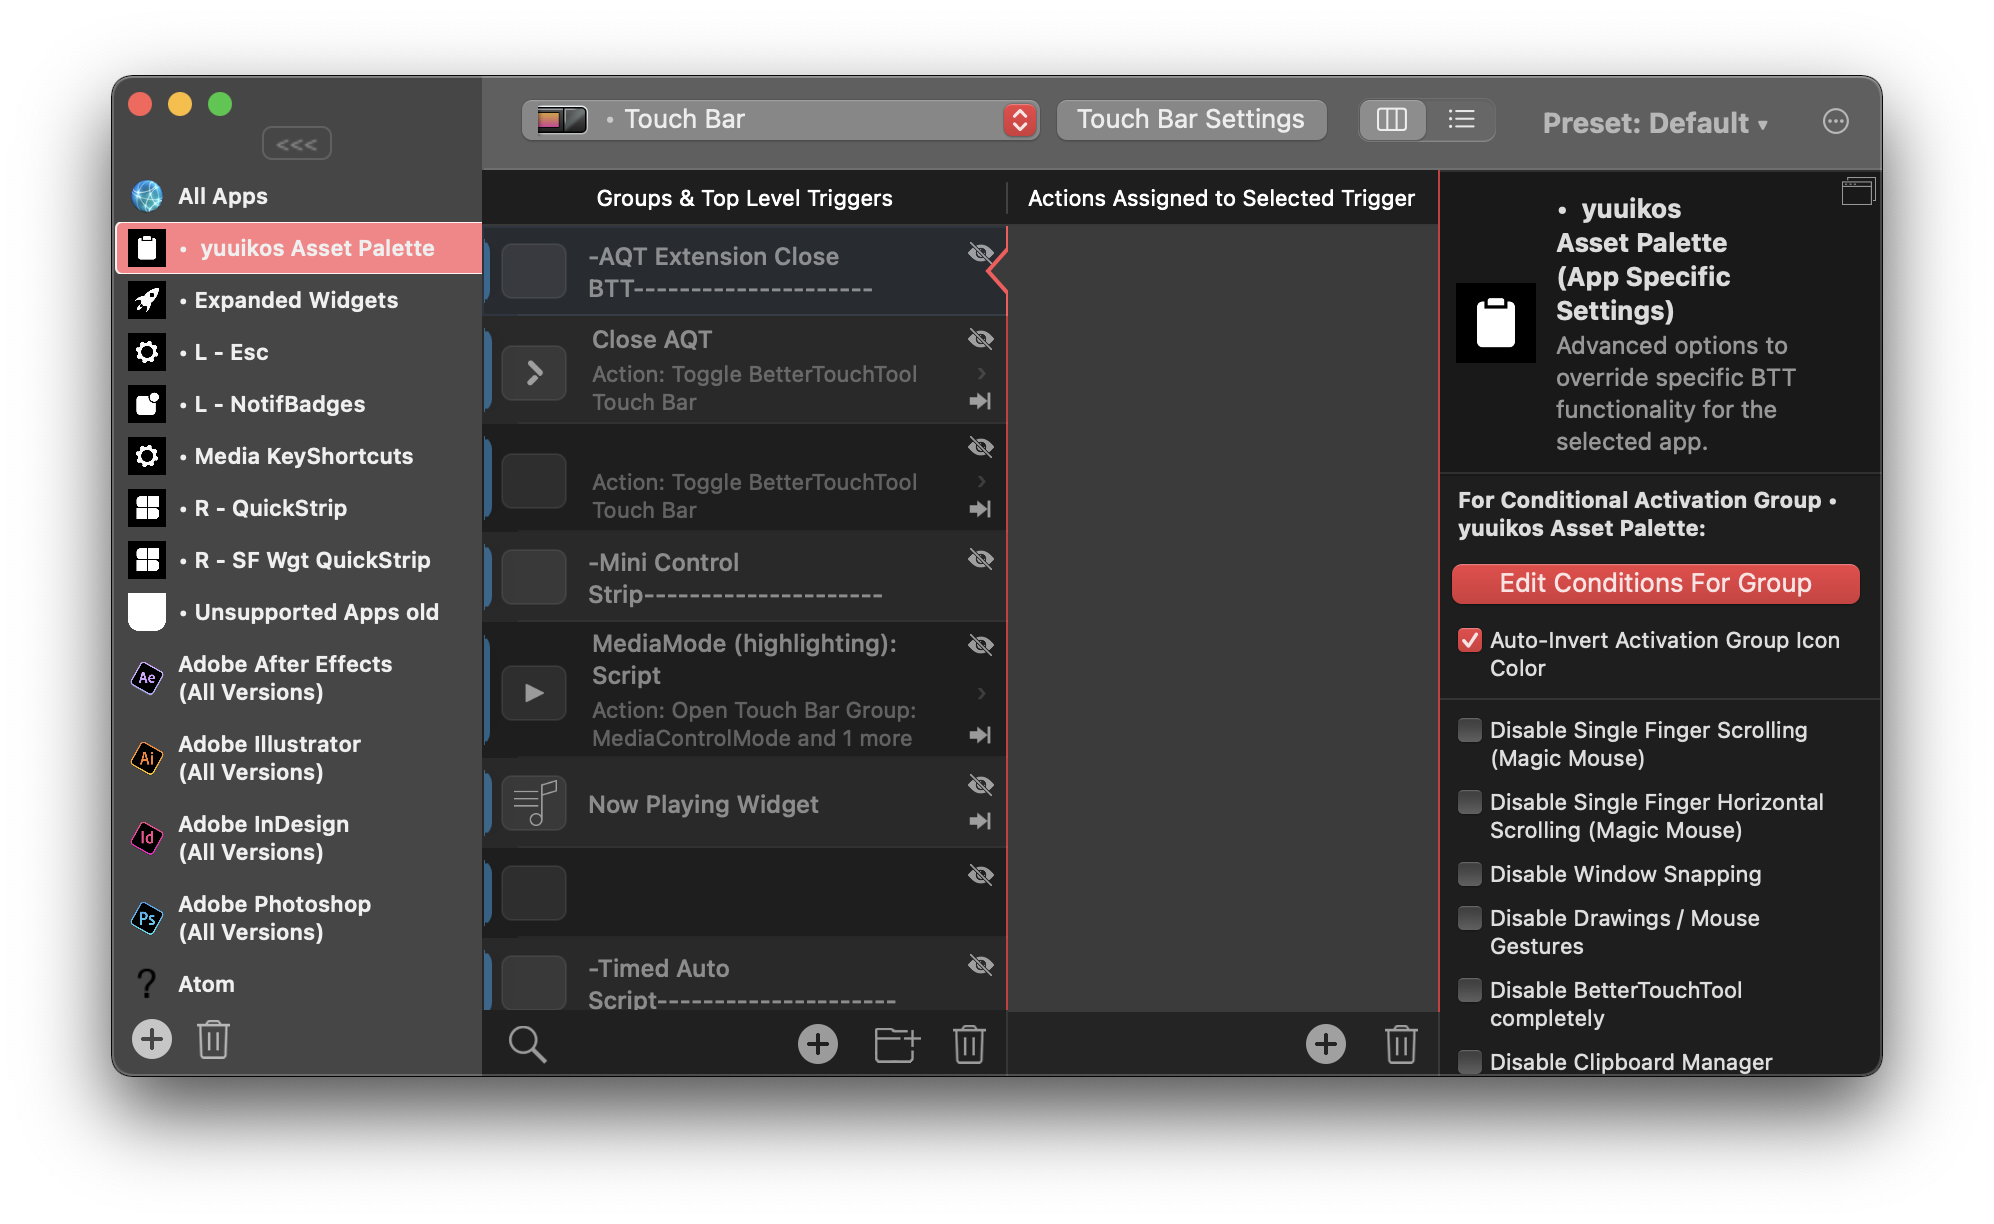
More people will lament the passing of the Touch Bar than the butterfly, because it provided some interesting functionality. I completely understand the logic behind it. F-keys are a completely opaque mechanism for providing useful shortcuts, and the Fn key alternates always felt like a kludge. The sliders to adjust volume or brightness are a slick demo, and I do like me some context-sensitive shortcut switching. But without folivora’s BetterTouchTool, I don’t think I would have liked the Touch Bar as much as I did. 

BetterTouchTool

Goodbye, old friends. You made the Touch Bar tolerable.

Unfortunately, Apple just didn’t commit to the Touch Bar, and that’s why it failed. An update with haptic feedback and an always-on screen would have made a lot of users happy. At least, it would have made me happy, but haptic feedback wouldn’t fix the “you need to look at it” or “I accidentally brushed against it” problems. But I think what really killed it was the unwillingness to expand it to other Macs by, say, external keyboards. The only users that truly loved the Touch Bar were the ones who embraced BetterTouchTool’s contextual presets and customization. With every OS update I expected Apple to bring more power to the Touch Bar, but it never came. Ironically, by killing the Touch Bar, Apple killed a major reason to buy BetterTouchTool. It’s like Sherlocking, but in reverse… a Moriartying! Sure, let’s roll with that.

I’ll miss my BTT shortcuts. I really thought Apple was going to add  half-height function keys and keep the Touch Bar. Maybe that was the plan at some point. Either way, the bill of materials for the Touch Bar has been traded for something else—a better screen, the beefier SOC, whatever. I may like BettterTouchTool, but I’m OK with trading the Touch Bar for an HDR screen.

Regardless of the technical merits for or against the Touch Bar, it will be remembered as a monument to Apple’s arrogance. They weren’t the first company to make a laptop with a touch-sensitive OLED strip on the keyboard. Lenovo’s Thinkpad X1 Carbon tried the same exact idea as the Touch Bar in 2014, only to ditch it a year later. Apple’s attempt reeked of “anything you can do, I can do better!” After all, Apple had vertical integration on their side and provided third-party hooks to let developers leverage this new UI. But Apple never pushed the Touch Bar as hard as it could have, and users sense half-heartedness. If Apple wanted to make the Touch Bar a real thing, they should have gone all-out. Commit to the bit. Without upgrades and investments, people see half-measure gimmicks for what they really are. Hopefully they’ve learned a lesson.

Any Port in a Storm

When the leaked schematics for these new MacBooks spoiled the return of MagSafe, HDMI, and an SD card slot, users across Mac forums threw a party. Apple finally conceded that one kind of port wasn’t going to rule them all. It’s not the first time Apple’s course corrected like this—adding arrow keys back to the Mac’s keyboard, adding slots to the Macintosh II, everything about the 2019 Mac Pro. When those rumors were proven true in the announcement stream, many viewers breathed a sigh of relief. The whole band isn’t back together—USB A didn’t get a return invite—but three out of four is enough for a Hall of Fame performance.

From left to right: MagSafe, Thunderbolt4, and headphones.

Let’s start with the the left-hand side of the laptop. Two Thunderbolt 4 ports are joined by a relocated headphone jack and the returning champion of power ports: MagSafe. After five years of living on the right side of Apple’s pro notebooks, the headphone jack has returned to its historical home. The headphone jack can double as a microphone jack when used with TRRS headsets, and still supports wired remote commands like pause, fast forward, and rewind. Unfortunately, I can’t test its newest feature: support for high-impedance headphones, but if you’re interested in that, Apple’s got a support document for you. Optical TOSLINK hasn’t returned, so if you want a digital out to an amplifier, you’ll need to use HDMI or an adapter.

Next is the return of MagSafe. If you ask a group of geeks which Star Trek captain was the superior officer, you might cause a fistfight. But poll that same group about laptop power connectors, and they’ll all agree that MagSafe was the perfect proprietary power port. When the baby pulls your power cable or the dog runs over your extension cord, MagSafe prevents a multi-thousand dollar disaster. After all, you always watch where you’re going. You’d never be so careless… right? Perish the thought.

But every rose has its thorns, just like every port has its cons. Replacing a frayed or broken MagSafe cord was expensive and inconvenient because that fancy proprietary cable was permanently attached to the power brick. When MagSafe connectors were melting, Apple had to replace whole bricks instead of just swapping cables. Even after that problem was solved, my MagSafe cables kept fraying apart at the connector. I replaced three original MagSafe blocks on my white MacBook, two of which were complementary under Apple’s official replacement plan. My aluminum MacBook Pro, which used the right-angle style connector, frayed apart at a similar rate. Having to replace a whole power brick due to fraying cables really soured me on this otherwise superior power plug.

Meet the new MagSafe—not the same as the old MagSafe.

When Apple moved away from MagSafe in 2016, I was one of the few people actually happy about it! All things equal, I prefer non-proprietary ports. When Lightning finally dies, I’ll throw a party. By adopting USB Power Delivery, Apple actually gave up some control and allowed users to charge from any PD-capable charger. Don’t want an expensive Apple charger? Buy Anker or Belkin chargers instead! Another advantage I love is the ability to charge from either side of the laptop. Sometimes charging on the right hand side is better! You could also choose your favorite kind of cable—I prefer braided right-angle ones.

But with every benefit comes a tradeoff. USB Power Delivery had a long-standing 100 watt limit when using a specially rated cable. If a laptop needed more power, OEMs had no choice but to use a proprietary connector. What’s worse, 100 watts might not be enough to run your CPU and GPU at full-tilt while maintaining a fast charging rate. If USB-C was going to displace proprietary chargers, it needed to deliver MORE POWER!

The USB Implementation Forum fixed these issues in May when they announced the Power Delivery 3.1 specification. The new spec allows for 140, 180, and 240 watt power supplies when paired with appropriately rated cables. These new power standards mean the clock is ticking on proprietary power plugs. So how can MagSafe return in a world where USB-C is getting more powerful?

Logo Soup

Of course, the proliferation of standards means adding a new logo every time. Thus sulving the problem once and for all.

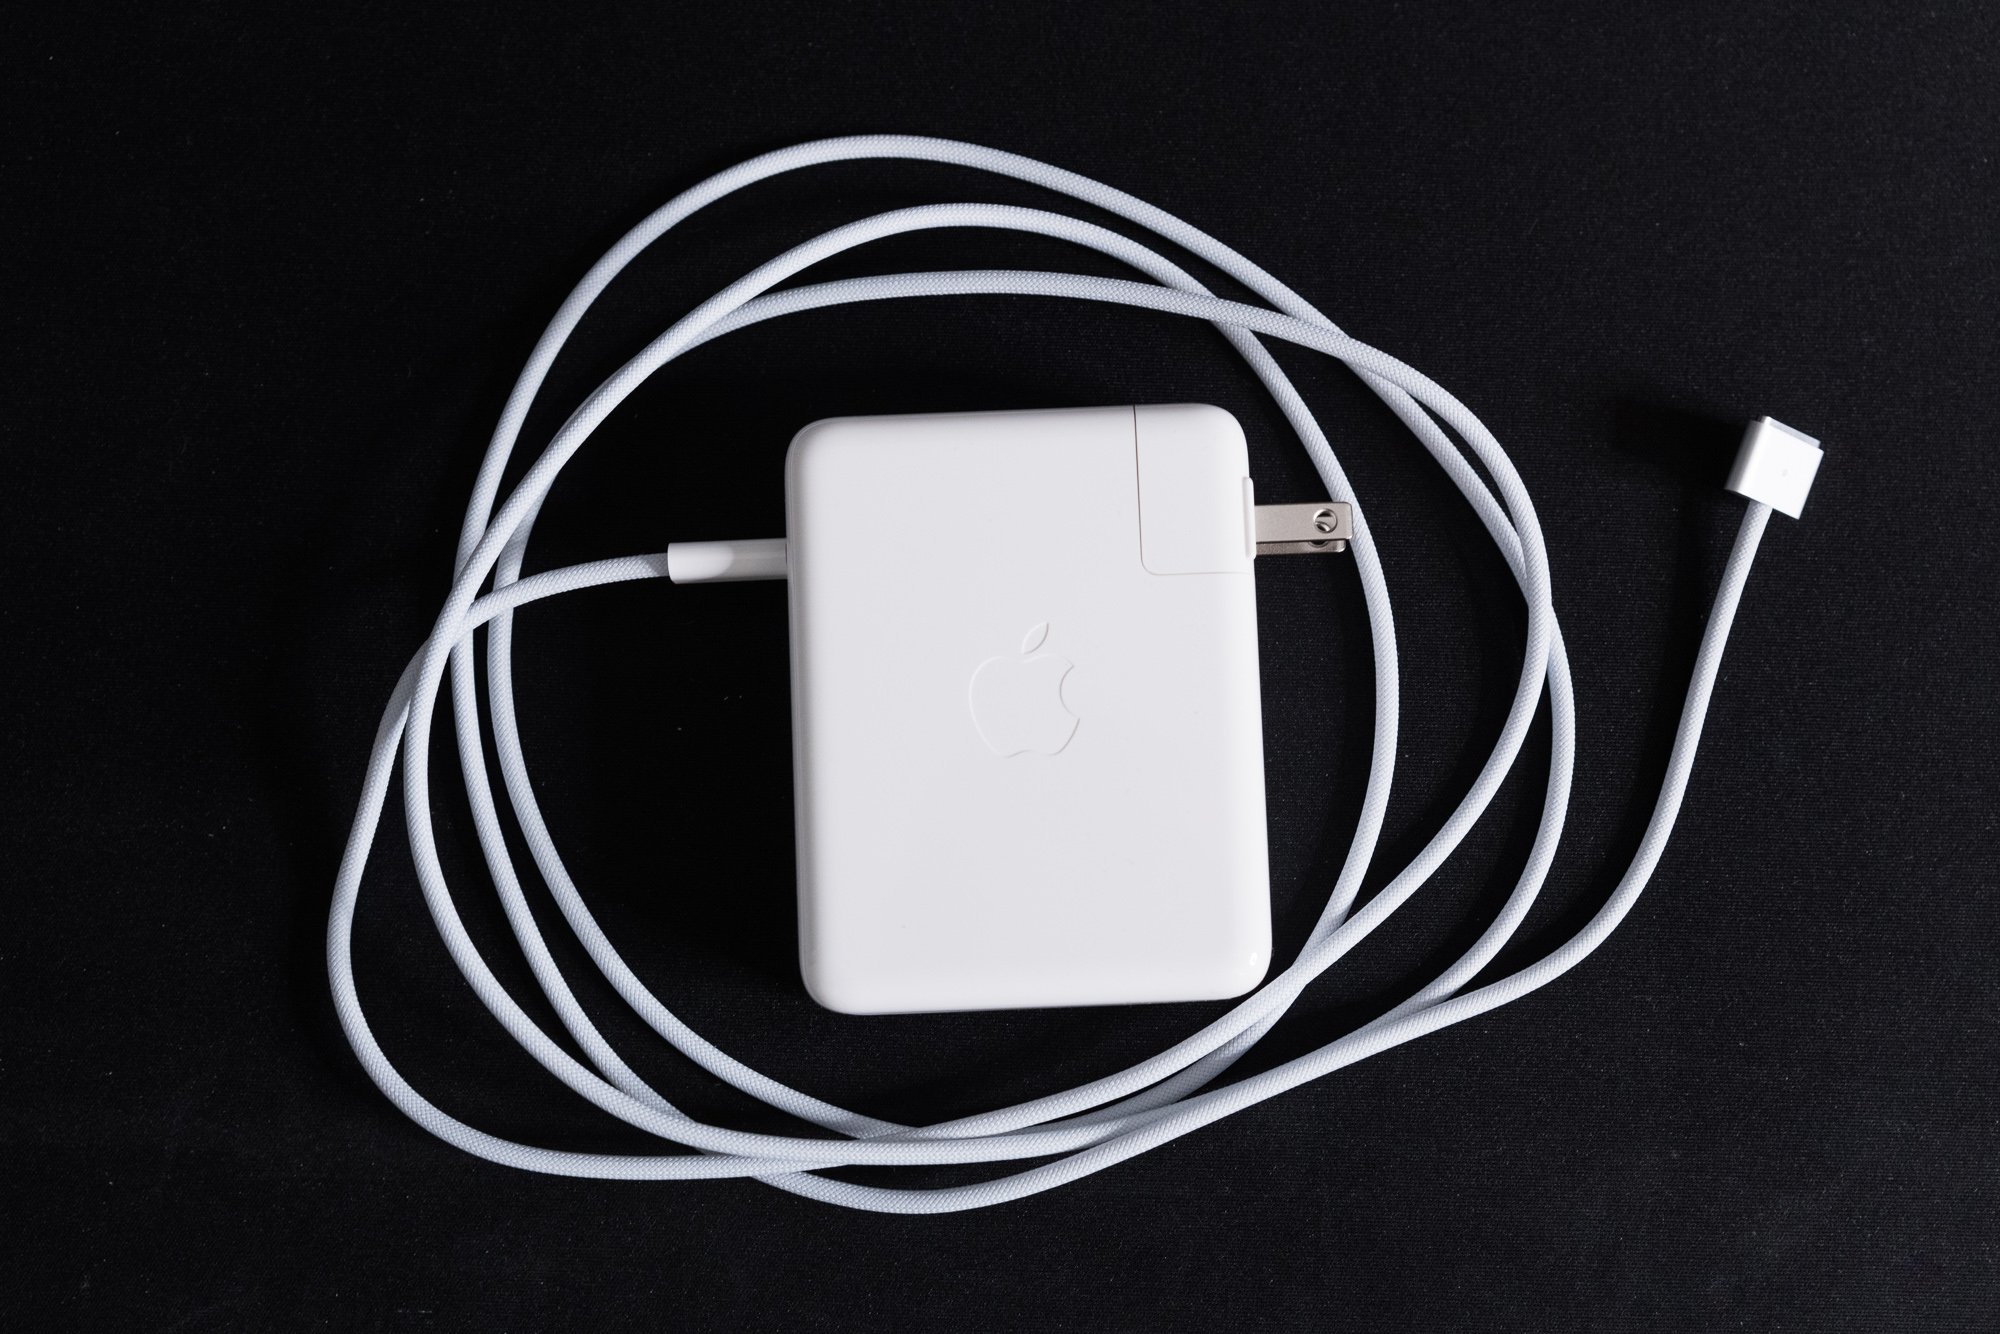
The good news is that the new power supply has a Type C connector and supports the new USB Power Delivery 3.1 standard. Apple’s 145 watt power supply will work just fine with 140W USB C cables. It so happens that Apple’s cable has Type C on one end and MagSafe on the other. That makes it user replaceable, to which I say thank freakin’ God. You can even use the MagSafe cable with other PD chargers, but you won’t get super fast charging if you use a lower-rated brick. The cable is now braided, which should provide better protection against strain and fraying, and the charging status light is back too.

Don’t fret if you use docks, hubs, or certain monitors—you can still charge over the Thunderbolt ports, though you’ll be limited to 100W of power draw. This means no half-hour fast charging on the 16 inch models, but depending on your CPU and GPU usage you’ll still charge at a reasonable rate. If you lose your MagSafe cable or otherwise need an emergency charge, regular USB power delivery is ready and waiting for you. I’ve been using my old 65W Apple charger and 45W Anker charger with the 16 inch and it still charges, just not as quickly.

Does the third iteration of MagSafe live up to the legacy of its forebears? Short answer: yes. The connector’s profile is thin and flat, measuring an eighth of an inch tall by three quarters wide. My first test was how well it grabs the port when I’m not looking at it. Well, it works—most of the time. One of the nice things about the taller MagSafe 1 connector was the magnet’s strong proximity effect. So long as the plug was in the general vicinity of the socket, it’d snap right into place. MagSafe 2 was a little shorter and wider, necessitating more precision to connect the cord. That same precision is required with MagSafe 3, but all it means is that you can’t just wave the cord near the port and expect it to connect. As long as you grasp the plug with your thumb and index finger you’ll always hit the spot, especially if you use the edge of the laptop as a guide.

In a remarkable act of faith, I subjected my new laptop to intentional yanks and trips to test MagSafe’s effectiveness. Yanking the cable straight out of the laptop is the easiest test, and unsurprisingly it works as expected. It takes a reasonable amount of force to dislodge the connector, so nuisance disconnects won’t happen when you pick up and move the laptop. The next test was tripping over the cord while the laptop was perched on my kitchen table. MagSafe passed the test—the cable broke away and the laptop barely moved. It’s much easier to disconnect the connector when pulling it up or down versus left or right, and that’s due to the magnet’s aspect ratio. There’s just more magnetic force acting on the left and right side of the connector. I would say this is a good tradeoff for the usual patterns of yanks and tugs that MagSafe defends against, like people tripping over cables on the floor that are attached to laptops perched on a desk, sofa, or table. The downside is that if your tug isn’t tough enough, you might end up yanking the laptop instead. USB-C could theoretically disconnect when pulled, but more often than not a laptop would go with it. Or your cable would take one for the team and break away literally and figuratively. Overall, I think everyone is glad to have MagSafe back on the team.

Oh, and one last thing: the MagSafe cable should have been color matched to the machine it came with. If Apple could do that for the iMac’s power supply cable, they should have done it for the laptops. My Space Gray machine demands a Space Gray power cable!

From left to right: UHS-II SD Card, Thunderbolt 4, and HDMI 2.0.

Let’s move on to the right-hand side’s ports. Apple has traded a Thunderbolt port for an HDMI 2.0 port and a full-sized SD card slot. These returning guests join the system’s third Thunderbolt 4 port. The necessity of these connections depends on who you ask, but for the MacBook Pro’s target audience of videographers, photographers, and traveling power users, they’ll say “yes, please!” TVs, projectors, and monitors aren’t abandoning HDMI any time soon. SD is still the most common card format for digital stills and video cameras, along with audio recorders. Don’t forget all the single board computers, game consoles, and other devices that use either SD or MicroSD cards.

First up: the HDMI port. There’s already grousing and grumbling about the fact that it’s only HDMI 2.0 compatible and not 2.1. There’s a few reasons why this might be the case—bandwidth is a primary one, as HDMI 2.1 requires 48 gigabits per second bidirectional to fully exploit its potential. There’s also the physical layer, which is radically different compared to HDMI 2.0 PHYs. 4k120 monitors aren’t too common today, and the ones that do exist are focused on gamers. The most common use case for the HDMI port is connecting to TVs and projectors on the go, and supporting a native 4k60 is fine for today. It might not be fine in five years, but there’s still the Thunderbolt ports for more demanding monitors. You know what would have been really cool? If the HDMI port could also act like a video capture card when tethered to a camera. Let the laptop work like an Atomos external video recorder! I have no idea how practical it would be, but that hasn’t stopped me from dreaming before.

The SD card sticks out pretty far from the slot.

Meanwhile, the SD slot does what it says on the tin. The port is capable of UHS-II speeds and is connected via PCI Express. Apple System Profiler says it’s a 1x link capable of 2.5GT/s—basically, a PCI-E 1.0 connection. That puts an effective cap of 250MB/s on the transfers. My stable of UHS-I V30 SanDisk Extreme cards work just fine, reading and writing the expected 80 to 90 megabytes per second. Alas, I don’t have any UHS-II cards to test. The acronym soup applied to SD cards is as confusing as ever, but if you’re looking at the latest crop of UHS-II cards, they tend to fall in two groups: slower v60, and faster v90. The fastest cards can reach over 300 megabytes per second, but Apple’s slot won’t go that fast. If you have the fastest, most expensive cards and demand the fastest speeds, you’ll still want to use a USB 3.0 or Thunderbolt card reader. As for why it’s not UHS-III, well, those cards don’t really exist yet. UHS-III slots also fall back to UHS-I speeds, not UHS-II. Given these realities, UHS-II is a safe choice.

Even if you’re not a pro or enthusiast camera user, the SD slot is still handy for always-available auxiliary storage. The fastest UHS-II cards can’t hope to compete with Apple’s 7.4 gigabytes-per-second NVME monster, but you still have some kind of escape hatch against soldered-on storage. Just keep in mind that the fastest UHS-II cards are not cheap—as of this writing, 256 gig V90 cards range between $250 and $400 depending on the brand. V60 cards are considerably cheaper, but you’ll sacrifice write performance. Also, the highest capacity UHS-II card you can buy is 256 gigs. If you want 512 gig or one terabyte cards, you’ll need to downgrade to UHS-I speeds. Also, an SD card sticks out pretty far from the slot—something to keep in mind if you plan on leaving one attached all the time.

I know a few people who attach a lot of USB devices that are unhappy about the loss of a fourth Thunderbolt port. But the needs of the many outweigh the needs of the few, and there are many more who need always available SD cards and HDMI connectors without the pain of losing an adapter. Plus, having an escape hatch for auxiliary storage takes some of the sting out of Apple’s pricey storage upgrades.

Awesome. Awesome to the (M1) Max.

Yes, yes, we’ve finally arrived at the fireworks factory. Endless forum and twitter posts debated the possibilities of  what Apple’s chip design team could do when designing a high-end chip. Would Apple stick to a monolithic die or use chiplets? How many GPU cores could they cram in there? What about the memory architecture? And how would they deal with yields? Years of leaks and speculation whetted our appetites, and now the M1 Pro and Max are finally here to answer those questions.

The answer was obvious: take the recipe that worked in the M1 and double it. Heck, quadruple it! Throw the latest LPDDR5 memory technology in the package and you’ve got a killer system on chip. It honestly surprised me that Apple went all-out like this—I’m used to them holding back. Despite all its power, the first M1 was still an entry level chip. Power users who liked the CPU performance were turned off by memory, GPU, or display limitations. Now that Apple is making an offering to the more demanding user, will they accept it?

M1, M1 Pro, M1 Max

The M1 Pro is a chonky chip, but the M1 Max goes to an absurd size. (Apple official image)

Choosing between the M1 Pro and M1 Max was a tough decision to make in the moment. If you thought ARMageddon would mean less variety in processor choices, think again. It used to be that the 13 inch was stuck with less capable CPUs and a wimpy integrated GPU, while the 15 and 16 inch models were graced with more powerful CPUs and a discrete GPU. Now the most powerful processor and GPU options are available in both 14 and 16 inch forms for the first time. In fact, the average price difference between an equally equipped 14 and 16 inch model is just $200. Big power now comes in a small package.

Next, let’s talk performance. Everyone’s seen the Geekbench numbers, and if you haven’t, you can check out AnandTech. I look at performance from an application standpoint. My usage of a laptop largely fits into two categories: productivity and creativity. Productivity tasks would be things like word processing, browsing the web, listening to music, and so on. The M1 Max is absolutely overkill for these tasks, and if that’s all you did on the computer, the M1 MacBook Air is fast enough to keep you happy. But if you want a bigger screen, you’ll have to pay more for compute you don’t need in a heavier chassis. I think there’s room in the market for a 15 inch MacBook Air that prioritizes thinness and screen space over processor power. I’ll put a pin in that for a future episode.

In average use, the efficiency cores take control and even the behemoth M1 Max is passively cooled. My 2018 13 inch MacBook Pro with four Thunderbolt ports was always warm, even if the fans didn’t run. My usual suspects include things like Music, Discord, Tweetdeck, Safari, Telegram, Pages, and so on. That scenario is nothing for the 16 inch M1 Max—the bottom is cool to the touch. 4K YouTube turned my old Mac into a hand warmer, and now it doesn’t even register. For everyday uses like these, the E-cores keep everything moving. Just like the regular M1, they keep the system responsive under heavy load. Trading two E-cores for two P-cores negatively affects battery life, but not as much as you’d think. Doing light browsing, chatting, and listening to music at medium brightness used about 20% battery over the course of two and a half hours. Not a bad performance at all, but not as good as an M1 Air. The M1 Pro uses less power thanks to a lower transistor count, so if you need more battery life, get the Pro instead of the Max.

Izotope

Izotope RX is a suite of powerful audio processing tools, and it’s very CPU intensive.

How about something a bit more challenging? These podcasts don’t just produce themselves—it takes time for plugins and editing software to render them. My favorite audio plugins are cross-platform, and they’re very CPU intensive, making them perfect for real-world tests. I used a 1 hour 40 minute raw podcast vocal track as a test file for Izotope RX’s spectral de-noise and mouth de-clicker plugins. Izotope RX is still an Intel binary, so it runs under Rosetta and takes a performance penalty. Even with that penalty, I’m betting it’ll have good performance. My old MacBook Pro would transform into a hot, noisy jet engine when running Izotope. Here’s hoping the M1 Max does better.

These laptops also compete against desktop computers, so I’ll enter my workstation into the fight. My desktop features an AMD Ryzen 5950X and Nvidia 3080TI, and I’m very curious how the M1 Max compares. When it’s going full tilt, the CPU and GPU combined guzzle around 550 watts. I undervolt my 3080TI and use curve optimizer on my 5950X, so it’s tweaked for the best performance within its power limits.

For a baseline, my 13 inch Pro ran Spectral De-Noise at 4:02.79. The M1 Max put in two minutes flat. The Max’s fans were barely audible, and the bottom was slightly warm. It was the complete opposite of the 13 inch, which was quite toasty and uncomfortable to put on my lap. It would have been even hotter if the fans weren’t running at full blast. Lastly, the 5950X ran the same test at 2:33.8. The M1 Max actually beat my ridiculously overpowered PC workstation, and it did it with emulation. Consider that HWInfo64 reported 140W of CPU package power draw on the 5950X while Apple’s power metrics reported around 35 watts for the M1X. That’s nearly one quarter the power! Bananas.

Izotope RX Spectral De-Noise

Time in seconds. Shorter bars are better.

Next is Mouth De-click. It took my 13 inch 4 minutes 11.54 seconds to render the test file. The de-clicker stresses the processor in a different way, and it makes the laptop even hotter. It can’t sustain multi-core turbo under this load, and if it had better cooling it may have finished faster. The M1 Max accomplished the same goal in one minute, 26 seconds, again with minimum fan noise and slight heat. Both were left in the dust by the 5950X, which scored a blistering fast 22 seconds—clearly there’s some optimizations going on. While the 5950x was pegged at 100% CPU usage across all cores on both tests, the de-noise test only boosted to 4.0GHz all-core. De-clicker boosted to 4.5GHz all-core and hit the 200W socket power limit. Unfortunately, I don’t know about the inner workings of the RX suite to know which plugins use AVX or other special instruction sets.

Izotope RX Mouth De-Click

Time in seconds. Shorter bars are better.

How about video rendering? I’m not a video guy, but my pal Steve—Mac84 on YouTube—asked me to give Final Cut Pro rendering a try. His current machine, a dual-socket 2012 Cheesegrater Mac Pro, renders an eleven minute Youtube video in 7 minutes 38 seconds. That’s at 1080p with the “better quality” preset, with a project that consists of mixed 4K and 1080P clips.  The 13 inch MBP, in comparison, took 11 minutes 54 seconds to render the same project. Both were no match for the M1 Max, which took 3 minutes 24 seconds. Just for laughs, I exported it at 4K, which took 12 minutes 24 seconds. Again, not a video guy, but near-real time rendering is probably pretty good! I don’t have any material to really push the video benefits of the Max, like the live preview improvements, but I’m sure you can find a video-oriented review to test those claims.

Final Cut Pro 1080p Better Quality Export

Time in minutes. Shorter bars are better.

Lightroom Classic is another app that I use a lot, and the M1 Max shines here too. After last year’s universal binary update, Lightroom runs natively on Apple Silicon, so I’m expecting both machines to run at their fullest potential. Exporting 74 Sony a99ii RAW files at full resolution—42 megapixels—took 1 minute 25 seconds on the M1 Max. My 5950x does the same task in 1 minute 15 seconds. Both machines pushed their CPU usage to 100% across all cores, and the 5950X hit 4.6GHz while drawing 200W. If you trust powerstats, the M1 Max reported around 38 watts of power draw. Now, I know my PC is overclocked—an out-the-box 5950x tops out at 150W and 3.9GHz all-core. But AMD’s PBO features allow the processor to go as fast as cooling allows, and my Noctua cooler is pretty stout. Getting that extra 600 megahertz costs another 40 to 50 watts, and that nets a 17 percent speed improvement. Had I not been running Precision Overdrive Boost 2, the M1 Max may very well have won the match. Even without the help of PBO, it’s remarkable that the M1 Max is so close while using a fifth of the power. If you’re a photo editor doing on-site editing, this kind of performance on battery is remarkable.

Adobe Lightroom Classic 42MP RAW 74 Image Export

Time in seconds. Shorter Bars are better.

Lastly, there’s been a lot of posting about game performance. Benchmarking games is very difficult right now, because anything that’s cross platform is probably running under Rosetta and might not even be optimized for Metal. But if your game is built on an engine like Unity, you might be lucky enough to have Metal support for graphics. I have one such game: Tabletop Simulator. TTS itself still runs in Rosetta, but its renderer can run in OpenGL or Metal modes, and the difference between the two is shocking. With a table like Villainous: Final Fantasy, OpenGL idles around 45-50 FPS with all settings maxed at native resolution. Switch to the Metal renderer and TTS locks at a stable, buttery smooth 120FPS. Even when I spawned several hundred animated manticores, it still ran at a respectable 52 FPS, and ProMotion adaptive sync smoothed out the hitches. Compare that to the OpenGL renderer, which chugged along at a stutter-inducing 25 frames per second. TTS is a resource hungry monster of a game even on Windows, so this is great performance for a laptop. Oh, and even though the GPU was running flat out, the fans were deathly quiet. I had to put my ear against the keyboard to tell if they were running.

Tabletop Simulator Standard

Frames per Second. Taller bars are better.

Tabletop Simulator Stress Test

Frames per Second. Taller bars are better.

My impression of the M1 Max is that it’s a monster. Do I need this level of performance? Truthfully, no—I could have lived with an M1 Pro with 32 gigs of RAM. But there’s something special about witnessing this kind of computing power in a processor that uses so little energy. I was able to run all these tests on battery as well, and the times were identical. Tabletop Simulator was equally performant. Overall, this performance bodes well for upcoming desktop Macs. Most Mac Mini or 27 inch iMac buyers would be thrilled with this level of performance. And of course, the last big question remains: If they can pull off this kind of power in a laptop, what can they do for the Mac Pro?

But it’s not all about raw numbers. If your application hasn’t been ported to ARM or uses the Metal APIs, the M1 Max won’t be running at its full potential, but it’ll still put in a respectable performance. There are still a few apps that won’t run at all in Rosetta or in Monterey, so you should always check with your app’s developers or test things out before committing.

Chips and Bits

Before I close this out, there’s a few miscellaneous observations that don’t quite fit anywhere else.

  • The fans, at minimum RPM, occasionally emit a slight buzz or coil whine. It doesn’t happen all the time, and I can’t hear it unless I put my ear against the keyboard. It doesn’t happen all the time, either.

  • High Power Mode didn’t make a difference in any of my tests. It’s likely good only for very long, sustained periods of CPU or GPU usage.

  • People griped about the shape of the feet, but you can’t see them at all on a table because the machine casts a shadow! I’m just glad they’re flat again and not those round things.

  • Kinda bummed that we still have a nearly square edge along the keyboard top case. I’m still unhappy with those sharp corners in the divot where you put your thumb to open the lid. You couldn’t round them off a little more, Apple?

  • The speakers are a massive improvement compared to the 2018 13 inch, but I don’t know if they’re better than the outgoing 16 inch. Spatial audio does work with them, and it sounds… fine, usually. The quality of spatial audio depends on masters and engineers, and some mixes are bad regardless of listening environment.

  • Unlike Windows laptops with rounded corners, the cursor follows the radius of the corner when you mouse around it. Yet you can hide the cursor behind the notch. Unless a menu is open, then it snaps immediately to the next menu in the overflow.

  • If only Apple could figure out a way to bring back the glowing Apple logo. That would complete these laptops and maybe get people to overlook the notch. Apple still seems to see the value too, because the glowing logo still shows up in their “Look at all these Macs in the field!” segments in livestreams. Apple, you gotta reclaim it back from Razer and bring some class back to light-up logos!

  • Those fan intakes on the bottom of the chassis are positioned right where your hands want to grab the laptop. It feels a little off, like you’re grabbing butter knives out of the dishwasher. They’ve been slightly dulled, but I would have liked more of a radius on them.

  • I haven’t thought of a place to stick those cool new black Apple stickers.

Comparison Corner

So should you buy one of these laptops? I’ve got some suggestions based on what you currently use.

  • Pre-2016 Retina MacBook Pro (or older): My advice is to get the 14 inch with whatever configuration fits your needs. You’ll gain working space and if you’re a 15 inch user you’ll save some size and weight. A 16 inch weighs about the same as a 15 inch, but is slightly larger in footprint, so if you want the extra real estate it’s not much of a stretch. This is the replacement you’ve been waiting for.

  • Post-2016 13 inch MacBook Pro: The 14 inch is slightly larger and is half a pound heavier, but it’ll fit in your favorite bag without breaking your shoulder. Moving up to a 16 inch will be a significant change in size and weight, so you may want to try one in person first. Unless you really want the screen space, stick to the 14 inch. You’ll love the performance improvements even with the base model, but I’d still recommend the $2499 config.

  • Post-2016 15 and 16 inch MacBook Pro: You’ll take a half-pound weight increase. You’ll love the fact that it doesn’t cook your crotch. You won’t love that it feels thicker in your hands. You’ll love sustained performance that won’t cop out when there’s heat all about. If you really liked the thinness and lightness, I’m sorry for your loss. Maybe a 15 inch Air will arrive some day.

  • A Windows Laptop: You don’t need the 16 inch to get high performance. If you want to save size and weight, get the 14 inch. Either way you’ll either be gaining massive amounts of battery life compared to a mobile workstation or a lot of performance compared to an ultrabook-style laptop. There’s no touch screen, and if you need Windows apps, well… Windows on ARM is possible, but there are gotchas. Tread carefully.

  • An M1 MacBook Air or Pro: You’ll give up battery life. If you need more performance, it’s there for you. If you need or want a bigger screen, it’s your only choice, and that’s unfortunate. Stick to the $2699 config for the 16 inch if you only want a bigger screen.

  • A Mac Mini or Intel iMac: If you’re chained to a desk for performance reasons, these machines let you take that performance on the road. Maybe it makes sense to have a laptop stand with a separate external monitor—but the 16 inch is a legit desktop replacement thanks to all that screen area. If you’re not hurting for a new machine, I’d say wait for the theoretical iMac Pro and Mac Mini Pro that might use these exact SoCs.

Two Steps Forward and One Step Back—This Mac Gets Pretty Far Like That

In the climactic battle at the end of The Incredibles, the Parr family rescues baby Jack-Jack from the clutches of Syndrome. The clan touches down in front of their suburban home amidst a backdrop of fiery explosions. Bob, Helen, Violet, and Dash all share a quiet moment of family bonding despite all the ruckus. Just when it might feel a little sappy, a shout rings out. “That was totally wicked!” It turns out that little neighbor boy from way back witnessed the whole thing, and his patience has been rewarded. He finally saw something amazing.

If you’re a professional or power user who’s been waiting for Apple to put out a no-excuses laptop with great performance, congratulations: you’re that kid. It’s like someone shrank a Mac Pro and stuffed it inside a laptop. It tackles every photo, video, and 3D rendering job you can throw at it, all while asking for more. Being able to do it all on battery without throttling is the cherry on top.

So which do you choose? The price delta between similarly equipped 14 and 16 inch machines is only $200, so you should decide your form factor first. I believe most users will be happy with the balance of weight, footprint, and screen size of the 14 inch model, and the sweet spot is the $2499 config. Current 13 inch users will gain a ton of performance without gaining too much size and weight. Current 15 inch users could safely downsize and not sacrifice what they liked about the 15 incher’s performance. For anyone who needs a portable workstation, the 16 inch is a winner, but I think more people are better served with the smaller model. If you just need more screen space, the $2699 model is a good pick. If you need GPU power, step up to the $3499 model.

We’ve made a lot of progress in 30 years.

There’s no getting around the fact that this high level of performance has an equally high price tag. Apple’s BTO options quickly inflate the price tag, so if you can stick to the stock configs, you’ll be okay. Alas, you can’t upgrade them, so you better spec out what you need up front. The only saving grace is the SD slot, which can act as take-anywhere auxiliary storage. Comparing to PC laptops is tricky. There are gamer laptops that can get you similar performance at a lower price, but they won’t last nearly as long on battery and they’ll sound like an F-22. Workstation-class laptops cost just as much and usually throttle when running on batteries. PCs win on upgradability most of the time—it’s cheaper to buy one and replace DIMMs or SSDs. Ultimately I expect most buyers to buy configs priced from two to three grand, which seems competitive with other PC workstation laptops.

The takeaway from these eleven thousand words is that we’ve witnessed a 2019 Mac Pro moment for the MacBook Pro. I think the best way of putting it is that Apple has remembered the “industrial” part of industrial design. That’s why the the Titanium G4 inspiration is so meaningful—it was one of the most beautiful laptops ever made, and its promise was “the most power you can get in an attractive package.” Yes, I know it was fragile, but you get my point. It’s still possible to make a machine that maximizes performance while still having a great looking design. That’s what we’ve wanted all along, and it’s great to see Apple finally coming around. Now, let’s see what new Mac Pro rumors are out there…