
The New Computer Desk Workshop
From the desk of Userlandia…
When I was a kid, TV and movies told me tales about the study: a mythical room in the house just for dear old Dad. An invitation to a man’s study was an invitation to his inner sanctum, where you would walk among rows of bookshelves, tiny ships in bottles, and elaborately framed artworks. While surely nice in their own right, these were the supporting cast to the real star: the desk. Crafted from cherry, walnut, or mighty oak, a stately desk tied the whole room together. Where else could you build tiny ships in bottles after writing a day’s worth of correspondence? But like most things on television, that study was a comforting fiction. Most American fathers were lucky to have a corner of the garage to themselves. But underneath all that Hollywood varnish was a woodgrain of truth: a good desk is the foundation of your workspace..
After years of making do with merely adequate desks, I was ready to invest in something more substantial. One reason I stuck with merely adequate desks for so long was a lack of space. My previous apartment was pretty cramped—at around 600 square feet there wasn’t much room for fancy setups. I was recording podcasts in the living room and my computer area was just big enough for a table and some shelves. All that changed in February 2020 when I moved to my current place. With double the square footage, I now had a second bedroom large enough to be a home office. There’d even be space left over for my vintage computer collection! A cheap tabletop with legs would no longer be appropriate. It was time for a real, honest-to-God desk.
This Old Desk
As tasteful a design as its name implies.
With all this newfound space, I knew the right kind of desk for the job: a corner-spanning L-shaped workstation. Normally this would be a job for the Ikea Galant system. With modular legs, frames, and tabletops, you could build a Galant desk to your exact specifications. L-shaped? Lovely. U-shaped? You got it. Even an ultra-long wall-spanning horizontal desk was possible, if that was your thing. Any of these configurations could be had at a reasonable price just by mixing and matching parts. Unfortunately for the Galant and its fans, Ikea replaced it in 2014 with the inferior Bekant system. The change wasn’t all bad—Bekant legs and frames are fairly sturdy, and the new sit-stand mechanisms were an improvement over the Galant’s. But the tabletops are thinner and cheaper, the fasteners can’t survive disassembly, and modularity is nowhere to be found.
Without the Galant, there’s no obvious choice for an inexpensive modular desk. Office furniture companies—the kind that sell cubicles—make modular furniture, but the general public isn’t their clientele and they charge accordingly. I scoured the depths of Amazon, Staples, and Wayfair but I couldn’t find a desk that met my requirements. I wanted an L-shaped desk that was at least six feet wide, with equal depth on both the main desktop and the return. I wanted a clear area underneath the desktop so I could move from one side to the other without the desk’s legs getting in the way. Some cabinets or drawers for storage would be great. The ability to easily disassemble the desk when I eventually move would be lovely, too.
Those all sound like reasonable requirements, but the devil is in the details. One of my monitors is a Wacom Cintiq tablet display for creating digital artwork. Thanks to an Ergotron monitor arm, I can pull the Cintiq into my lap for a more comfortable drawing position. But the downside is that the arm clamps to the desktop, which requires an overhanging lip. This eliminated a bunch of contenders which had flush-mounted frames or backing panels that would obstruct the clamps.
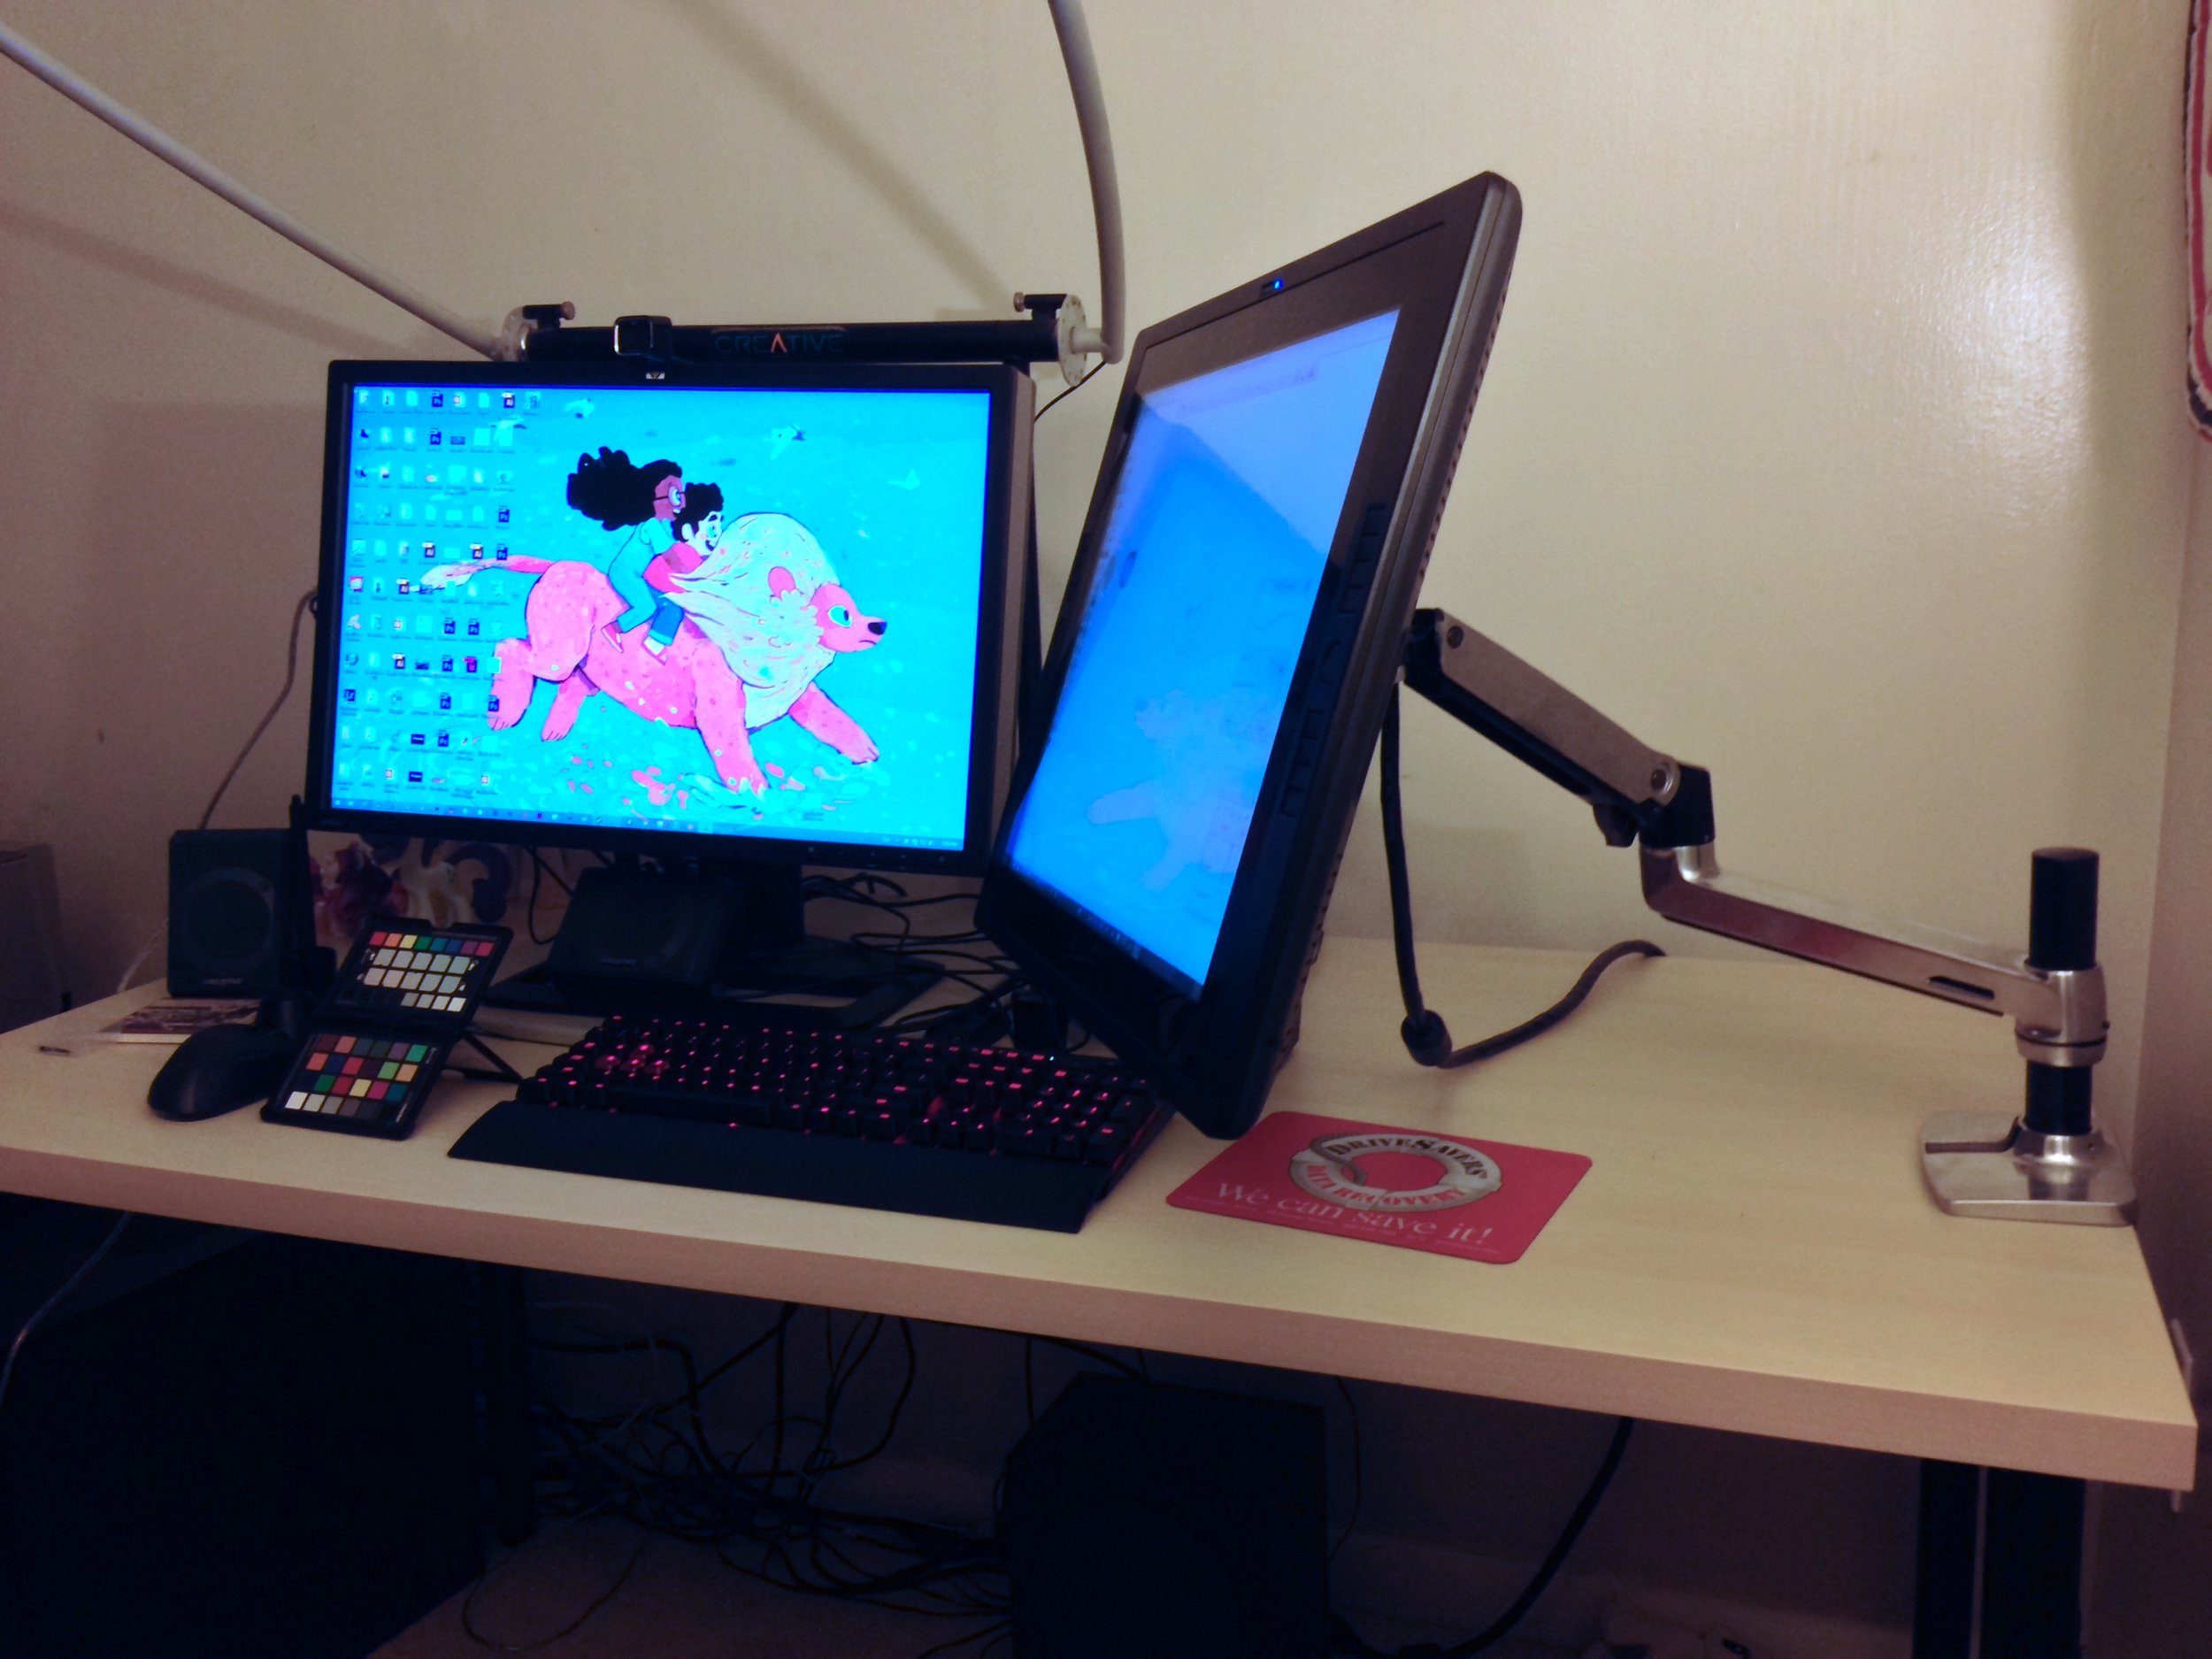
A photo from when I acquired this Cintiq in 2014. Note the Ergotron arm hold ing it up.
After I spent days rejecting countless prefabricated desks, I discovered the current trend in homebrew computer desks: the battlestation. I don’t particularly like this name—it sounds like something coined by people who use the term “PC Gaming Master Race” unironically and without realizing the implications. But I’ll grant them the benefit of the doubt and think of it more in the Star Trek sense. These so-called battlestations are usually made by setting a countertop or solid-core door on top of two filing cabinets, adjustable trestles, or steel tube legs. This isn’t a new concept, because tables and workbenches made from simple materials have been around for centuries. Office desks in cubicles around the globe have tabletops set upon filling and storage cabinets. So what’s different?
The most common example of a battlestation-type desk is an Ikea Gerton or Karlby countertop perched on two Alex drawer cabinets. For around $300 out the door, you could have a sturdy desk with ample workspace, weight capacity, and storage to rival $600 options at an office supply store. Of course, that means dealing with Ikea, purveyor of meatballs and stoic Scandinavian design. One catch is that you’re still bound to the whims of Ikea product planners. Ikea’s a global company whose pursuit of margins is legendary. They’re not afraid to rethink existing products to wring out more profit, and even simple countertops can’t escape the Swedish eye. Gerton countertops—made of actual solid wood—were replaced by the Karlby, which is wood veneer laminated to medium density fiberboard. Granted, the veneer is actual wood, and it’s fairly thick too. But laminated MDF can suffer from bowing without support underneath the entire surface. A Karlby is still better than flimsy honeycomb-shaped cardboard sandwiched between particleboard like the Linmon or Lagkapten.
To be kinder to “engineered wood,” solid wood options also have their caveats. Karlby countertops come pre-finished, which can be a real time saver. You can sand and refinish them if you choose, but it’s completely optional. Gertons, like most butcher blocks, are unfinished and require some kind of treatment. Be it stain, oil, or polyurethane, you’ll need something to protect the wood from yourself and the environment, and the finishing process takes time, space, and effort.
Another downside to Ikea is they might not be available to you. Many parts of America and the world don’t have access to an Ikea store. You might also have opinions about Ikea’s less-than-stellar corporate citizenship. Luckily, you can duplicate the battlestation look without going to Ikea. Any home improvement, hardware, or lumber store carries butcher block countertops in a variety of woods, sizes, and thicknesses. While you’re there, you can pick up legs and finishing materials. After that, you can stop at the office supply store to pick up filing cabinets. Even a solid-core door can serve as a nice tabletop if you can’t source a butcher block. Building one of these desks is a great first-time DIY project for a newbie, especially if you only need one of them. Even if you suffer from a mild case of carpenteria like The Lobe in Freakazoid, you can still put one of these together.
I ultimately settled for a hybrid approach for my desk: Ikea’s Alex drawers with butcher block countertops from Home Depot. Since I was building an L-shaped desk, my minimum equipment list looked something like this:
Two 6 foot long by 25 inch wide by 1.5 inch deep birch butcher blocks.
Three Alex drawers in gray-turquoise.
Two adjustable Olov table legs, saved from a previous table.
Two wire cable management trays.
Finishing materials.
The simplicity of this list undersells the amount of time it took to compile it. My goal here is to present all the information and research I collected during the month-long process of constructing these desks back in summer 2021. The end result is a sturdy, attractive desk that can take a lot of punishment and not fall apart.
Frequently Asked Questions
First, I must state up front that I am not a professional woodworker. All this information is compiled from my best research and advice from people I know who are better at this stuff than I am. I grew up watching The New Yankee Workshop, and Norm Abram’s advice is still the best: Before you use any tools, be sure to read, understand, and follow all the safety rules that come with your tools. Knowing how to use your tools properly will greatly reduce the risk of personal injury. And remember this: there’s no more important safety rule than to wear your safety glasses. You’ll also want to wear nitrile gloves and a respirator when sanding and finishing wood.
Before barreling into the build process, there’s some decisions you need to make. I had a lot of questions while doing my research, and depending on who I asked, I got a variety of answers. Before you spend a single dollar, you need to know exactly what you want to build. Here’s a list of frequently asked questions from myself and others about materials, finishes, and other decision points you’ll encounter when DIY-ing a desk.
Laminate or Hardwood? Most people assume that hardwood is always superior to engineered wood, but there’s advantages and disadvantages to both. The big advantage of laminated surfaces is that they don’t require any finishing. They’re ready to go out of the box, and they’re usually lighter and less expensive. While MDF-type engineered woods can be more susceptible to moisture damage or sagging, they can still withstand a lot of traditional abuse. An extra leg in the center of the back edge can prevent any sagging. While hardwood is more solid and less prone to warping, you’ll need to finish it, and that requires time and space. Speaking of that…
Finished or unfinished? When you go to Lowe’s or Home Depot to check out their stocks of butcher block countertops, you’ll notice that they’re all unfinished wood. That means you’ll need to sand, clean, and finish the entire surface of the block before putting it into service. Finishing is not particularly difficult—if you can build a PC, you can sand wood and apply polyurethane. But this process takes time, and you’ll need to spend a few days finishing the block. If you leave the block unfinished, it’ll be exposed to all the dangers of your environment. Spilled liquids, skin oils, and damp glasses all threaten to damage the wood. Plus, unfinished blocks are at risk for warping in humid environments. Don’t discount the risk of microbial contamination, either. You don’t want a moldy desk, right? Based on all of these factors, I always recommend finishing the wood.
Polyurethane, Oil, or Stain? There’s more than one way to finish wood, and the right one depends on the wood in question and where it’ll be used. Since we’re building a computer desk, we’re more concerned with aesthetics and maintenance. The easiest finish to apply is polyurethane, available in wipe- or brush-on formulas. Oils are next, with tung oil as the most common choice. Lastly, stains have the most color options, but they’re the most difficult to apply and you still need to seal it with polyurethane afterwards. All of these finishes are valid, but you should consider carefully the level of maintenance and curing time required for each of them.
Polyurethane: The easiest and fastest method to seal the wood and get it in service is a polyurethane finish. If you have a steady hand, you can use brush-on polyurethane to minimize the number of coats required to seal the block. An even easier method is wipe-on polyurethane, which can be applied with rags, applicator pads, or sponge brushes. Since wipe-on poly is thinner, it’s easier to apply a smooth, even coat of finish to the wood. That ease comes at a cost of money and time. Wipe-on poly is more expensive per quart and it usually takes three coats of wipe-on to get the same thickness as one coat of brush-on. You need a minimum of one coat of brush-on or three coats of wipe-on for the display side of the desk. Two or three coats of brush-on or six coats of wipe-on would be even better.
Oils: Most butcher blocks are installed in kitchens, therefore finishing discussions usually revolve around withstanding the abuse of knives and food safety. Oils are most frequently used in those environments since they’re easy to apply and food-safe. However, I recommend against oil finishes for desks. One reason is that most drying oils take a long time to properly cure, and most people aren’t willing to wait a month for a full cure. Another reason is that they require maintenance. Some oils require wipe down refreshes every few months, while others are once a year. Lastly, some oils like mineral oil are not “drying” finishes and can transfer to items set on the finish for a very long time. Mineral oil finishes are great for an actual countertop or cutting surface, but not so much for a computer desk. Oil finishes look beautiful—just be aware of the time and maintenance involved.
Stains: A stain can bring out the best in a wood’s natural character, but there’s many to choose from and applying consistent coats is difficult. Some types of woods are more receptive to staining than others. Stains can be tricky to apply for newbie finishers. If you want to take the time to stain, then go ahead, but be mindful of the block manufacturer’s recommendations. Also, all stained surfaces should be protected by a clear topcoat, so don’t forget to include that in your time and effort budget. Three coats of wipe-on polyurethane should be sufficient for a sealant.
How shiny should the finish be? I prefer a satin or matte finish. This is entirely a personal choice, but I think a glossy desk would be distracting.
What about pre-finished butcher blocks? You can definitely buy a pre-finished butcher block. Local woodworking businesses often sell pre-finished countertops or worktops, and home improvement warehouses offer pre-finished blocks shipped to your door. I recommend dealing locally if you’re going this route, as shipping with a carrier like UPS can end in tragedy. I ordered a pre-finished block from Home Depot and it arrived chipped and cracked due to shipping damage. You’ll pay a hefty premium for a professionally finished block, but that premium saves you time. An unfinished six foot birch block from Home Depot cost me $180. A stained and sealed six foot maple block from a local hardwood dealer in the greater Boston area would have cost $460. If you don’t have the time or space to finish things yourself, that might be a price you’ll have to pay—only you can decide.
Drawers or Legs? Just because the average Reddit battlestation uses filing cabinets doesn’t mean you’re forced to use them. If you’re on a tight budget and are willing to sacrifice some storage space, you can save considerable cash by getting table legs from hardware or home improvement stores.
Consider that Alex drawers are $80 $90 to $110 per set, and you’ll need two to hold up a desktop. The various Alex knockoffs aren’t much cheaper, and quality metal file cabinets can be pricey. A set of four adjustable metal legs is only $40 from the home improvement store. Even if you need a fifth leg for extra stability, that’s still a considerable cost savings. The downside of using legs instead of drawers is that you sacrifice a lot of storage space, which you might find useful for a computer desk. Mixing and matching is always a possibility, so see what you can build within your budget.
The Finishing Line
After acquiring all of the necessary ingredients, I was ready to start building. Assembling the Alex drawers was easy enough—if you’ve built one Ikea product, you’ve built them all. The real test was finishing the desk tops. If you’re like me and don’t have a workshop, this can be a little tricky, but I still made it work, and you can too! I’m an amateur woodworker at best—I learned the basics from Sunday mornings with my grandfather in his basement workshop. It just takes time, patience, and a willingness to learn. Remember those warnings I gave you about tools and safety, and remember that this is just one nerd’s DIY advice.
Step one: Prepare your work area. I constructed a makeshift workbench out of a folding table, PVC pipe fittings, and no-slip rubber mats. The fittings kept the counter off of the folding table, and the no-slip rubber mats kept them from marring the block’s surface. Big box fans placed in the windows worked as my exhaust ventilation. Use some newspaper or drop cloths to save your floors from any spilled or dropped finish. Don’t forget to wear clothes that you won’t mind getting dirty and don your safety gear. A respirator mask, eye protection, and nitrile gloves are highly recommended.
My makeshift work area.
Step two: Prepare your countertops. Check the spec sheet that came with your block to see what level of sanding needs to be done. In my case, I used 220 grit sandpaper to sand along the grain of the wood. The block should feel nice and smooth when you’re done. Disposable sanding blocks or sponges make sanding easy, so don’t skip it. When you’re finished sanding, you’ll need to clean up all the dust you created. Use a vacuum cleaner with a soft bristle attachment to suck up any wood dust, and then wipe down the block with a damp tack cloth. You can use mineral spirits, but a dry lint-free cloth worked well enough for me.
After sanding, make note of which side of the block has the least amount of knots, dings, and flaws in the wood. The cleanest side should be the actual desk top, and you’ll want apply more coats of finish to that side.
Step three: Applying the finish. This is for sure the longest and most difficult step, depending on what you’ve selected for a finish. I chose satin wipe-on polyurethane for my blocks because I wanted an easy to apply finish with a smooth, muted character. Remember: three coats of wipe-on poly equals one coat of brush-on. Wipe-on poly is easy to apply, but the extra coats and drying time adds up. Since I wasn’t in a rush, wipe-on was fine with me.
You want the polyurethane container stirred, not shaken—sorry, Mister Bond. Don’t pour the finish straight from the container onto the block—that’s a rookie mistake. Do pour the polyurethane into something sacrificial, like a plastic bowl. Next, rip up some clean white cotton t-shirts to make some applicator rags. Fold one up into a square, gently dip it into the bowl, and apply the finish along the grain. You want to channel Mister Miyagi here—wipe it on, then wipe off the excess in broad, overlapping strokes. Double check for any missed spots by using an overhead lamp, and don’t forget to finish the side of the block along with the top. Pretty soon you’ll have your first coat finished, and it’ll take about one to two hours for that coat to dry. Before applying the next coat, lightly sand the surface with a fine grit sandpaper block and wipe down with a dry lint-free cloth to remove any dust. This light sanding is optional, but it helps the finish stick and avoids high spots.
If you’ve never worked with wipe-on polyurethane before, make sure your environment is well-ventilated and that you use a fresh applicator or rag for each coat. When you’re done with the coat, take the rag and lay it flat outdoors so it can dry and cure. We’ll talk about rag disposal later, but remember: never ball up wet rags, don’t store wet rags in an enclosed space, and don’t layer wet rags on top of each other.
A fully finished, cured block ready to go into service.
One day and six coats later, the top and sides were finished. I debated on whether or not to finish the bottom side. It is technically optional, but in the end I spent the extra time to do it. I only applied three coats to the bottom, but hey, it’s still finished. After I finished finishing the finish, I put the first block aside in another room for twenty for hours to allow the finish to completely cure. That freed up my workspace so I could start finishing the second block.
Once the finish was cured, it was time for Step Four: the final touches. Before setting the block on to the cabinets, I rubbed down all the surfaces with a folded paper grocery bag. This was an old trick I learned from my grandfather. Paper bags have a texture similar to ultra-fine grit sandpaper, and they’re great for polishing off any remaining high spots or dust bits. With both blocks finished, it was time to actually put the desk together. Joy!
But before I do that, I needed to clean up my work space. Make sure you follow the instructions provided by your finish’s manufacturer and dispose of all of your materials properly. If you’ve never done finishing work before, remember this: never ball or pile up oily rags, and don’t store them near flammable material! Always take your rags outdoors, unfold them, and either hang them up or lay them out on the ground to dry. Polyurethane rags are usually cured stiff and safe to dispose after twenty four hours or so, but other finishes might take longer. Why is this important? Most oil-based finishes like stains, penetrating oils, and polyurethanes cure via an exothermic reaction—meaning the oxidization that hardens the finish generates heat. If those rags are piled on top of each other or balled up in a container, the heat generated by the oxidization has nowhere to go. A few hours later, this heat can reach the flashpoint of the oily material—like cotton rags—and cause spontaneous combustion. The last thing you want is a fire, so be careful! Consult with your local fire or hazardous waste department for the best way to dispose of used finishing rags. I also suggest following the Dry, Dunk, Dispose method preached by UL if you can. Also, for the love of God, don’t pour polyurethane, mineral spirits, stains, and so on down your household drain.
Fully Armed and Operational
Most battlestation builders are done when their countertops are fully cured. Lay the block on top of two filling cabinets, and ta-da, your desk is ready for action. But one of the advantages of DIY is that you can modify and customize things to your liking, and my L-shaped setup needed a few fixtures before entering service. First up was a pair of legs to support the inside corner of the L. Some pilot holes and a few screws later and they were securely fixed to the block. Next was a cable management guide, again easily attached to both blocks with a few screws. Finally, I cut some no-slip shelf mats—the kind you use in cupboards—to put between the blocks and the drawers. These mats keep the countertops from moving or shifting on top of the drawers, though nothing is stopping you from screwing the blocks into the drawers for an even firmer connection. I chose not to connect the two halves of the L together with brackets, but you can if you like.
After a week’s worth of shopping, assembly, preparation, and more, the desks were finally complete. I understand why people who put these together swear by them—they look and feel great. The clear satin finish brings out the woodgrain’s understated character—a perfect match for my New England sensibilities. Combine that with the dark turquoise drawers and the whole package has an eye-popping contrast that looks stylish and professional.
Now that’s what I call a desk.
No desk would be complete without the items it was built to hold. An L-shaped desk is easy to divide into two workspaces: one side for my work computer, the other side for my personal one. I could have just tossed my monitors and computers on the desks and called it a day, but I wanted to make things look and work even better than before. If I was going to spend the time and effort to do this, I should do it right.
One element that elevates the style of any computer desk is monitor arms. I was already a fan of VESA-mount arms thanks to the Ergotron arm I use with my Wacom Cintiq, and I wanted to bring that level of flexibility to the rest of my displays. Most monitor arms clamp to the edge of the desk, and this frees up valuable desk space occupied by traditional stands. They also tend to have more freedom of movement in all three axes. Built-in cable management disguises unsightly wires and keeps your desk clutter-free. Plus, they just look cooler than the cheap, plasticky stands most monitors come with these days. Even a Monoprice monitor arm looks better than the sorry excuse of a stand LG ships with their very expensive monitors. That’s what I wound up buying, by the way—the Monoprice arms are doing a great job for just fifty bucks a piece. They even support my 34 inch 5K ultrawide with no complaints. Of course, clamps aren’t just for monitors, either. iPad holders, ring light poles, and webcam scissor arms all easily attach to the edge of the desk. Don’t underestimate this ability, because it helps keep your working surface clear for the stuff you actually need to work on.
Maintaining a polyurethane finish is super easy—just wipe it down with a damp cloth. Got a scratch or a nick? Some clear acrylic nail polish can fill in flaws, and once it’s dried just polish up the fixed area using those brown bags or ultra-fine grit sandpaper. A great way to keep your desk free of marks and dings is to use a desk mat. Just like blotters or those big desk calendars back in the day, desk mats keep your keyboards, mice, and pens from mucking up your finish. Plus, they act as giant coasters, so they’re perfect for the requisite cups of coffee or other beverages that you’ll have by your side.
Why Build One When You Can Build Two For Twice The Price?
So how much damage did this do to my wallet? Here’s the cost of the materials for the desks:
2x Hardwood Reflections Butcher Blocks: $180 each ($229 as of this post)
3x Ikea Alex Drawers: $80 each ($90 for white or $110 for turquoise in 2022)
2x Ikea Olov legs: $15 each (I already had them, but I’m listing the price anyway)
2x Ikea Signum cable management guides: $15 each ($20 in 2022)
Finishing materials (wipe-on poly, rags, mineral spirits, disposable drop cloths, spacers, anti-slip mats, sandpaper): $50
That puts the total around $710 before tax for an L-shaped setup. That was back in 2021, and I’m betting prices have only gone up. If I built a single desk, it would have been more around $400. How does that compare to a prefab option from Amazon, Wayfair, or an office supply store? Amazon and Wayfair carry everything from Ikea knockoff garbage up to real wood office furniture, but anything within the $3-400 price range is going to be laminated MDF, sometimes of dubious origin. Office supply stores have more recognizable brand names, like Sauder and Bush, but you might not like their staid, boring style. It’s hard to argue with the value here If your time and budget allows for it. Another popular alternative is Husky workbenches, usually sold at home supply stores. You can buy a pre-finished top and use your own legs or frames, saving you time as long as you like a natural finish. Husky is even making kits targeted towards desk use—and they’re very affordable.
Overall, I’m very satisfied with the setup. I’ve never had something that felt so solid—I’m used to particleboard or MDF desks with flimsy frames. The amount of workspace is similar to what I had at my office job for a long time. But I don’t think I would have been as satisfied if I didn’t attach all my monitors to VESA arms. The amount of desk space that monitor arms free up can’t be underestimated. If you’re going to commit to this style of desk, you should plan on using VESA arms as well. You don’t need the most expensive Ergotron arms unless you are constantly moving your displays around. Monoprice is good enough for the price.
One last point that got me to open up my wallet and put in my time to do this was the knowledge that I could hold on to these for the long haul. These desks are super simple to take apart—just pick up and move the components. I don’t have to worry about losing screws or brackets or bits. When I eventually move, these desks aren’t getting torn apart or sent to the thrift store—they’re keepers. Overall, this setup is an easy way to get a great desk for your dollar. It works well in a modern workspace or a retro environment. You don’t even have to buy new to do this—you can pick up used cabinets and old tabletops to build these on the cheap if you want to match your vintage computer equipment. The only limit is your imagination.